A retro gaming console is a device that lets you play video games from classic gaming consoles. With a retro gaming console, you can play Space Invaders and Pac-Man from the Atari. Or Super Mario Bros. from the Nintendo NES. Even Sonic the Hedgehog from the Sega Genesis. Using gaming emulation software, games from all of these old consoles can be installed on a Raspberry Pi and played just like they were in the past.

RetroPie Gaming Emulation Software
RetroPie is a gaming emulation software. Emulation software imitates a particular computer system. RetroPi emulates the computer systems of retro gaming consoles like the Apple II, Atari, Commodore 64, Nintendo NES, SNES, Gameboy, Nintendo 64, Sega Genesis, and even earlier versions of PlayStation.
The games are installed using ROMs, which are the software equivalent to game cartridges. ROMs can be downloaded from the internet and installed on the Raspberry Pi. However, keep in mind that many games are copyrighted and that it may be illegal to download and install ROMs for these games.
These are the parts you will need to build a fully-functional retro gaming console:
- Raspberry Pi
- MicroSD card
- MicroSD card reader
- HDMI cable
- Computer monitor or television with an HDMI port
- USB keyboard and mouse
- USB game controller
Try to use the latest version of the Raspberry Pi. Most of the games are resource intensive, so they require a lot of processing power to work smoothly with minimal lag.
The microSD card should be at least 16GB, but with more memory you can store more games and not worry about filling up the storage.
How to Install RetroPie
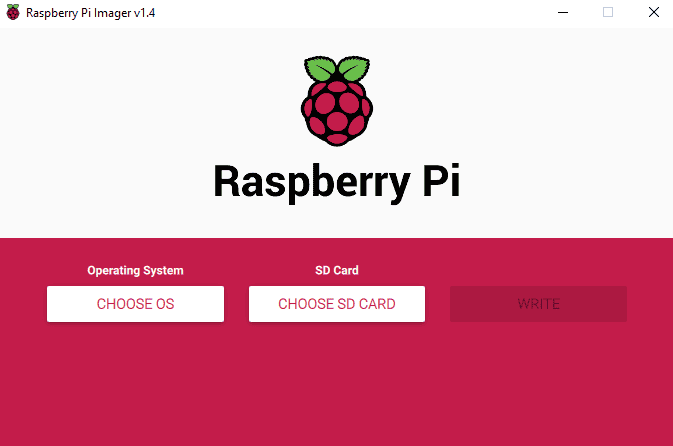
There are a few ways to install RetroPie, but we are going to use the simplest method. We will use the Raspberry Pi Imager to write the RetroPie image onto a microSD card.
First, download and install the Raspberry Pi Imager software to your computer. Raspberry Pi Imager can be downloaded from here.
Once the Raspberry Pi Imager software is installed on your computer, insert the microSD card into your computer. You might need to use a microSD card reader to do this.
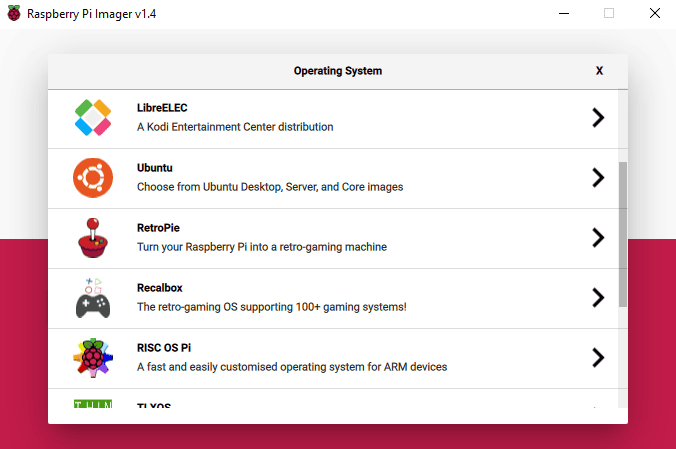
Now open the Raspberry Pi Imager program:
Next, choose RetroPie under the operating system section.
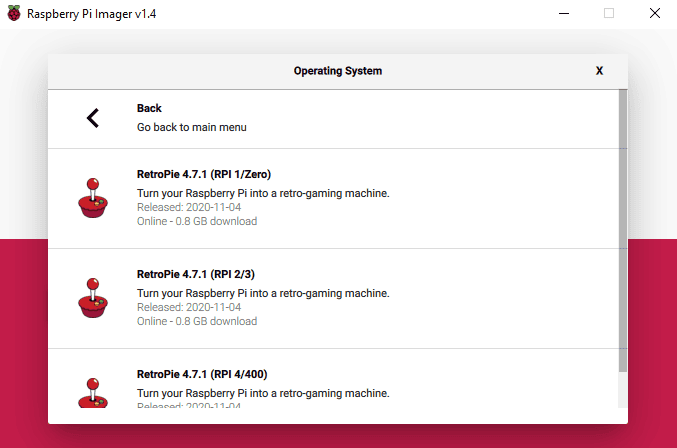
Choose the version of RetroPie that goes with your Raspberry Pi board.
Before the Raspberry Pi Imager starts writing to your microSD card, the program will ask you if it’s okay to delete all of the files on microSD card. Select yes to proceed.
Writing should take about five minutes, then another few for verification. After that, the imager will unmount the microSD card and confirm that RetroPie is installed.
Configuring Game Controllers
At first startup, RetroPie will ask you to hold a button on the game controller to start configuring it:
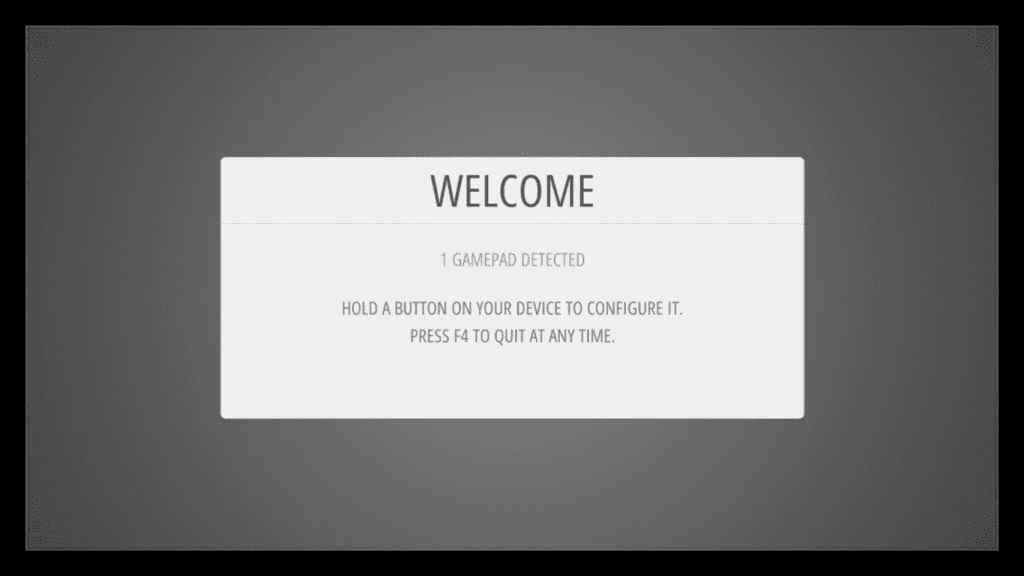
You can use most types of controllers with RetroPie. Follow the on-screen instructions to configure the game controller. If you run out of buttons, hold down any button to skip. When you get to OK, press the button you have configured as “A”.
Press F4 to quit anytime. This will take you to the command line. Use the command emulationstation to return to the main menu.
Basic Setup
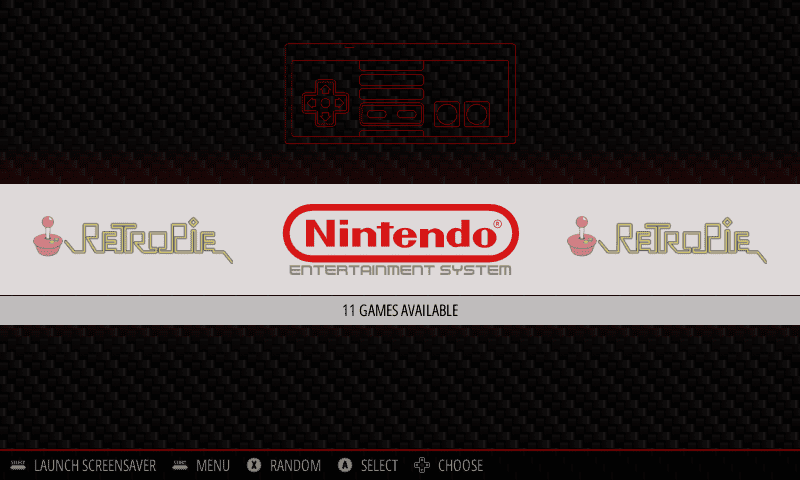
In the main menu, you can choose the emulator you want to play:
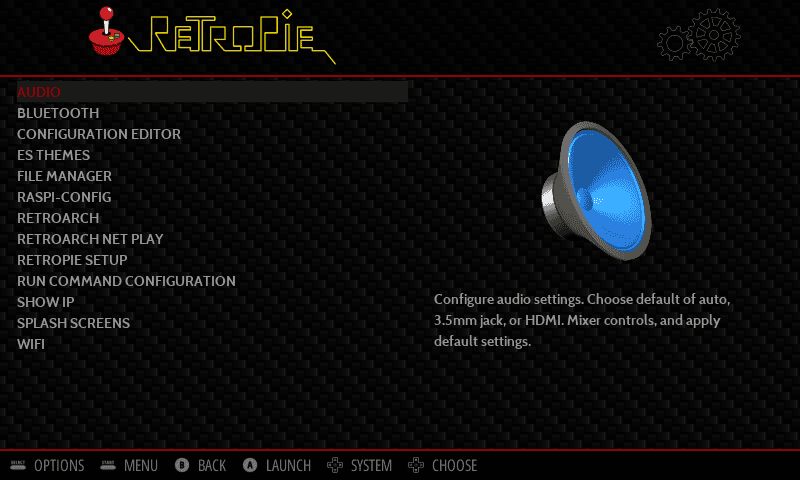
Settings for volume, Bluetooth, and WiFi are located in the RetroPie submenu. The RetroPie submenu also lets you access the file manager.
The RetroPie image we installed has Wi-Fi disabled by default. To transfer ROMs over WiFi instead of USB or Ethernet, you’ll need to connect to WiFi. You can do this by launching the Wi-Fi menu.

Now, find the SSID or the name of your Wi-Fi network and connect to it.
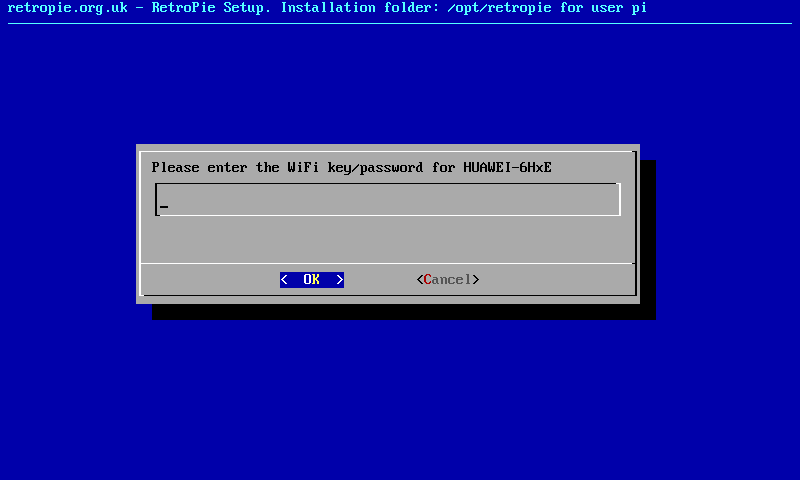
Enter the password for that Wi-Fi network.
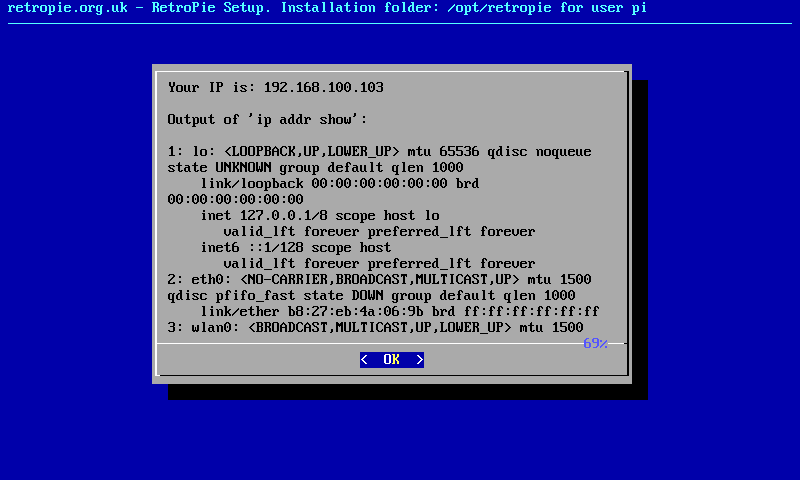
Now find your IP address. You can do this by pressing F4 to go to the command line and entering the ifconfig command. Alternatively, in the RetroPie menu select “Show IP” and it will display your IP address.
Once you get the IP address, enable SSH through the raspi-config menu. Check out our tutorial on how to Use PuTTY to Access the Raspberry Pi Terminal from a Computer for more info on using SSH to access the Raspberry Pi. This can also be done from the RetroPie menu.
Now you can connect to the RetroPie console from another computer. Using this method, the gaming console is run in headless mode – there is no monitor or keyboard attached to the Raspberry Pi, and all of the gaming is done on a computer connected to the Raspberry Pi over SSH.
Transferring and Installing ROMs
ROMs are downloaded over the internet and saved on your computer. The ROMs then need to be transferred to Raspberry Pi and installed in the RetroPie emulation software.
The easiest way to install ROMs is by using Samba Share. Samba Share is a software that allows you to access file systems over a Wi-Fi network. It comes pre-installed with RetroPie.
Type \\retropie or \\"your IP address" in the Windows Explorer file path bar on your computer:

Open the roms folder and save the ROM to the folder for the emulator you want to use. Now, reboot the Raspberry Pi. The game in the ROM should now appear in the RetroPie main menu.
Thanks for reading and be sure to leave a comment below if you have questions about anything!