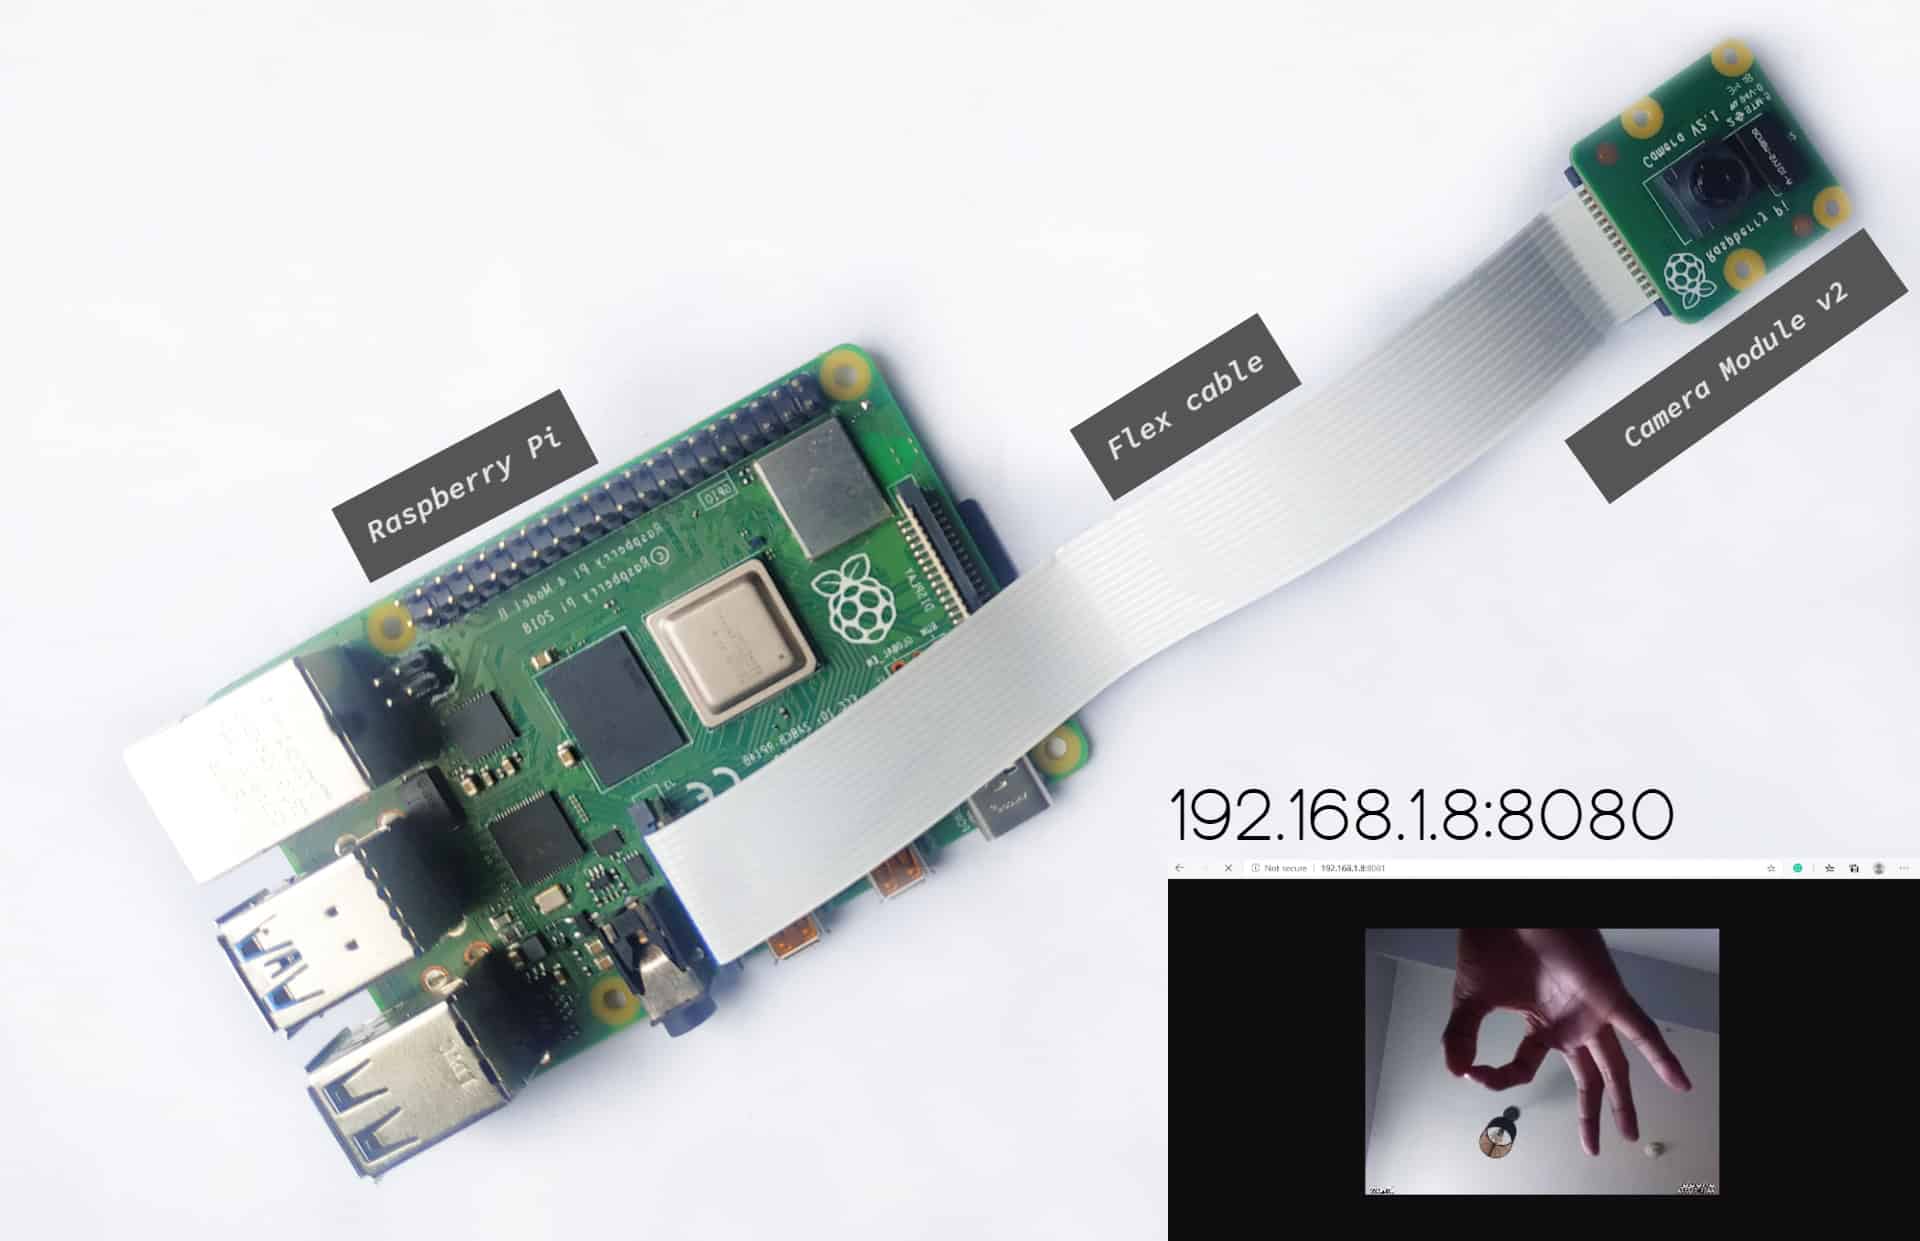
Been wanting to test the waters on a Raspberry Pi-based security camera project? You gotta learn the basics first. In this tutorial, you will learn how to create a webcam server using a Raspberry Pi camera module.

Webcam Server
A webcam server is a webpage that displays the output of an IP camera. Moreover, an IP camera is a device that communicates through an IP network. This means that it receives control data and sends image data using the network created by the router. A webcam server can be accessed by the devices connected to your local network or deployed to the internet via port forwarding. In this tutorial, we will tackle both.
Installing Motion
This tutorial assumes that you already have an OS installed in your Raspberry Pi.
First, open the terminal.
Make sure you’re using the latest version of the OS by entering the following commands:
sudo apt-get update
sudo apt-get upgrade
Next, install the Motion package from this link, Motion is a highly configurable program that monitors video signals from many types of cameras. This includes the Raspberry Pi Camera module. It lets you create pictures and videos, live stream cameras, or even use motion detection to log activities captured by your camera.
Now to install motion, we need first to install its dependencies. To do this, enter the following command:
sudo apt install autoconf automake build-essential pkgconf libtool git libzip-dev libjpeg-dev gettext libmicrohttpd-dev libavformat-dev libavcodec-dev libavutil-dev libswscale-dev libavdevice-dev default-libmysqlclient-dev libpq-dev libsqlite3-dev libwebp-devThen, download the Motion deb file using the wget command. In this tutorial, we will install the latest 4.3.1 version of Motion. If a new version comes up, you can find the link to its deb file on Motion’s releases page.
sudo wget https://github.com/Motion-Project/motion/releases/download/release-4.3.1/pi_buster_motion_4.3.1-1_armhf.debFinally, install the deb file using the dpkg tool.
sudo dpkg -i pi_buster_motion_4.3.1-1_armhf.debConfiguring Motion
Now that we have Motion in our systems, time to change the default settings to make it work with our Raspberry Pi.
Open the motion configuration file using the following command:
sudo nano /etc/motion/motion.confSearch for the following lines and replace them with the respective changes.
- daemon off -> daemon on
- stream_localhost on -> stream_localhost off
- picture_output on -> picture_output off
- movie_output on ->movie_output off
These commands let Motion operate as a background process, allow clients outside your LAN (Local Area Network) and work properly by disabling unwanted features.
Other Common Settings
- stream_maxrate 100 – allows less latency to achieve a more real-time response. When set to a value higher than what the Raspberry Pi is capable of, your video output will be flickering pink and green lines.
- framerate 100 – sets how many frames the camera captures in a second
- width 640 – changes the width
- height 480 – changes the height
Turning the daemon on in the motion configuration file is just part of setting up daemon. Next, we need to edit the original Motion file.
sudo nano /etc/default/motionInitialize daemon by changing start_motion_daemon=no to start_motion_daemon=yes. Save the file then exit.
Finally, you can start motion using the following command:
sudo service motion startOn the other hand, if you need to stop motion, enter the following command:
sudo service motion stopYou can also restart motion if the video lags or if you changed a setting while the camera is active.
sudo service motion stopSetting up the Camera Module
If we were using a USB camera, we could just visit the webcam stream using the IP address of the Raspberry Pi and the port number 808.
But this tutorial is using the Raspberry Pi Camera Module so we have a few more steps.
Installing the Camera Module
1. First, make sure the board has no power. Pull up on the edges of the camera port’s plastic clip.
2. Insert the ribbon cable to the port. The silver lines on the cable should face the silver lines on the port.
3. Gently push the clip back. The cable should be on tight fit with the port that it won’t slide out when jerked.
Setting up the Raspberry Pi
In order to make the camera work with the Raspberry Pi, we will need to configure the Pi’s settings first.
First, startup your Raspberry Pi.
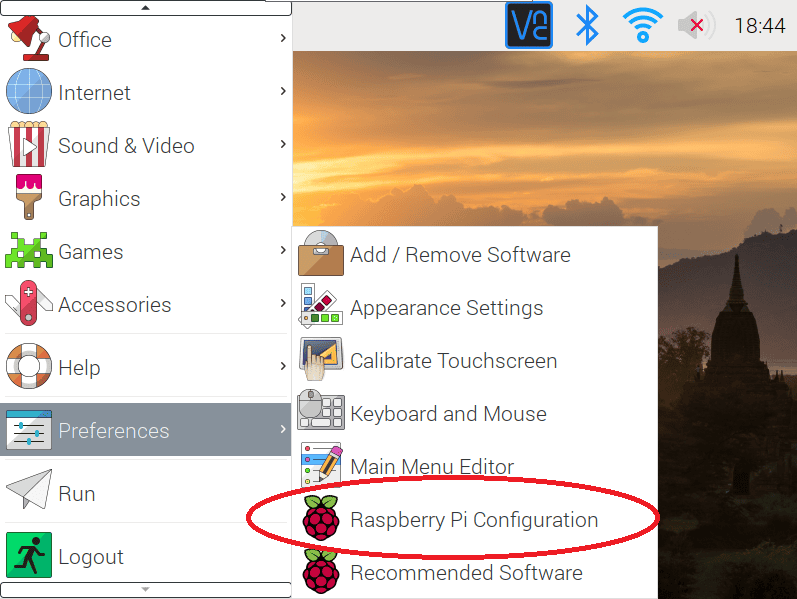
Open the Raspberry Pi Configuration tool using either the main menu or command line. In the main menu, you can find it under Preferences.
Otherwise, enter this command on the terminal.
sudo raspi-configNext, select Interfaces. The camera is disabled by default. Enable it then save the changes to raspiconfig.
Restart your Raspberry Pi.
Next, add the camera to the list of your Raspberry Pi’s modules. If your camera is not connected properly, this command will return an error.
sudo modprobe bcm2835-v4l2Alternatively, you can manually add the camera by editing the modules file. Enter the following command:
sudo nano /etc/modulesAdd the following line to the bottom of the text file. Save and Exit.
bcm2835-v4l2Finally, restart the Raspberry Pi.
sudo rebootAccessing the Webcam Server
Congratulations! You’re already streaming. You can now access the webcam stream using the IP address of the Raspberry Pi. Using any device connected to your LAN, open any web browser, and enter the following address:
YOUR PI's IP ADDRESS:8081For instance,
192.168.1.8:8081Port 8081 is the default for web camera servers. You can also change this by revisiting the motion configuration file in the second part of the procedure.
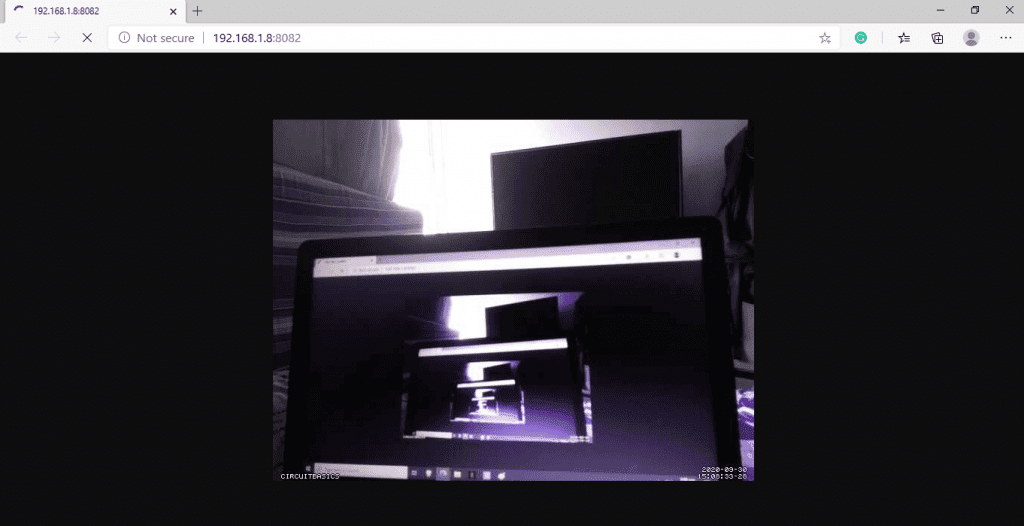
Demonstration
Here are some pics of my webcam server aka my failed attempt in creating an aesthetic shot. You can play around with the motion configuration file to access some cool features. If you see in my address bar, I changed the port number to 8082 to test if it will work. Well, it does. I also changed the label on the bottom left side of the stream. The label was originally “camera”. I changed it into circuitbasics for fun.
The stream also works on a phone connected to the LAN.
Hope this tutorial sparks some ideas on your side. See you next time and feel free to leave a comment below if you have questions about anything!

My name is Loui, i need helps to solve the problem fo Motion for web server application, (as published by you). All seems to be ok, But if i start Motion, automatically, my internet wifi is cutted. (cease fonctionning). why? i can’t find the cause. Please help me to solve this problem.