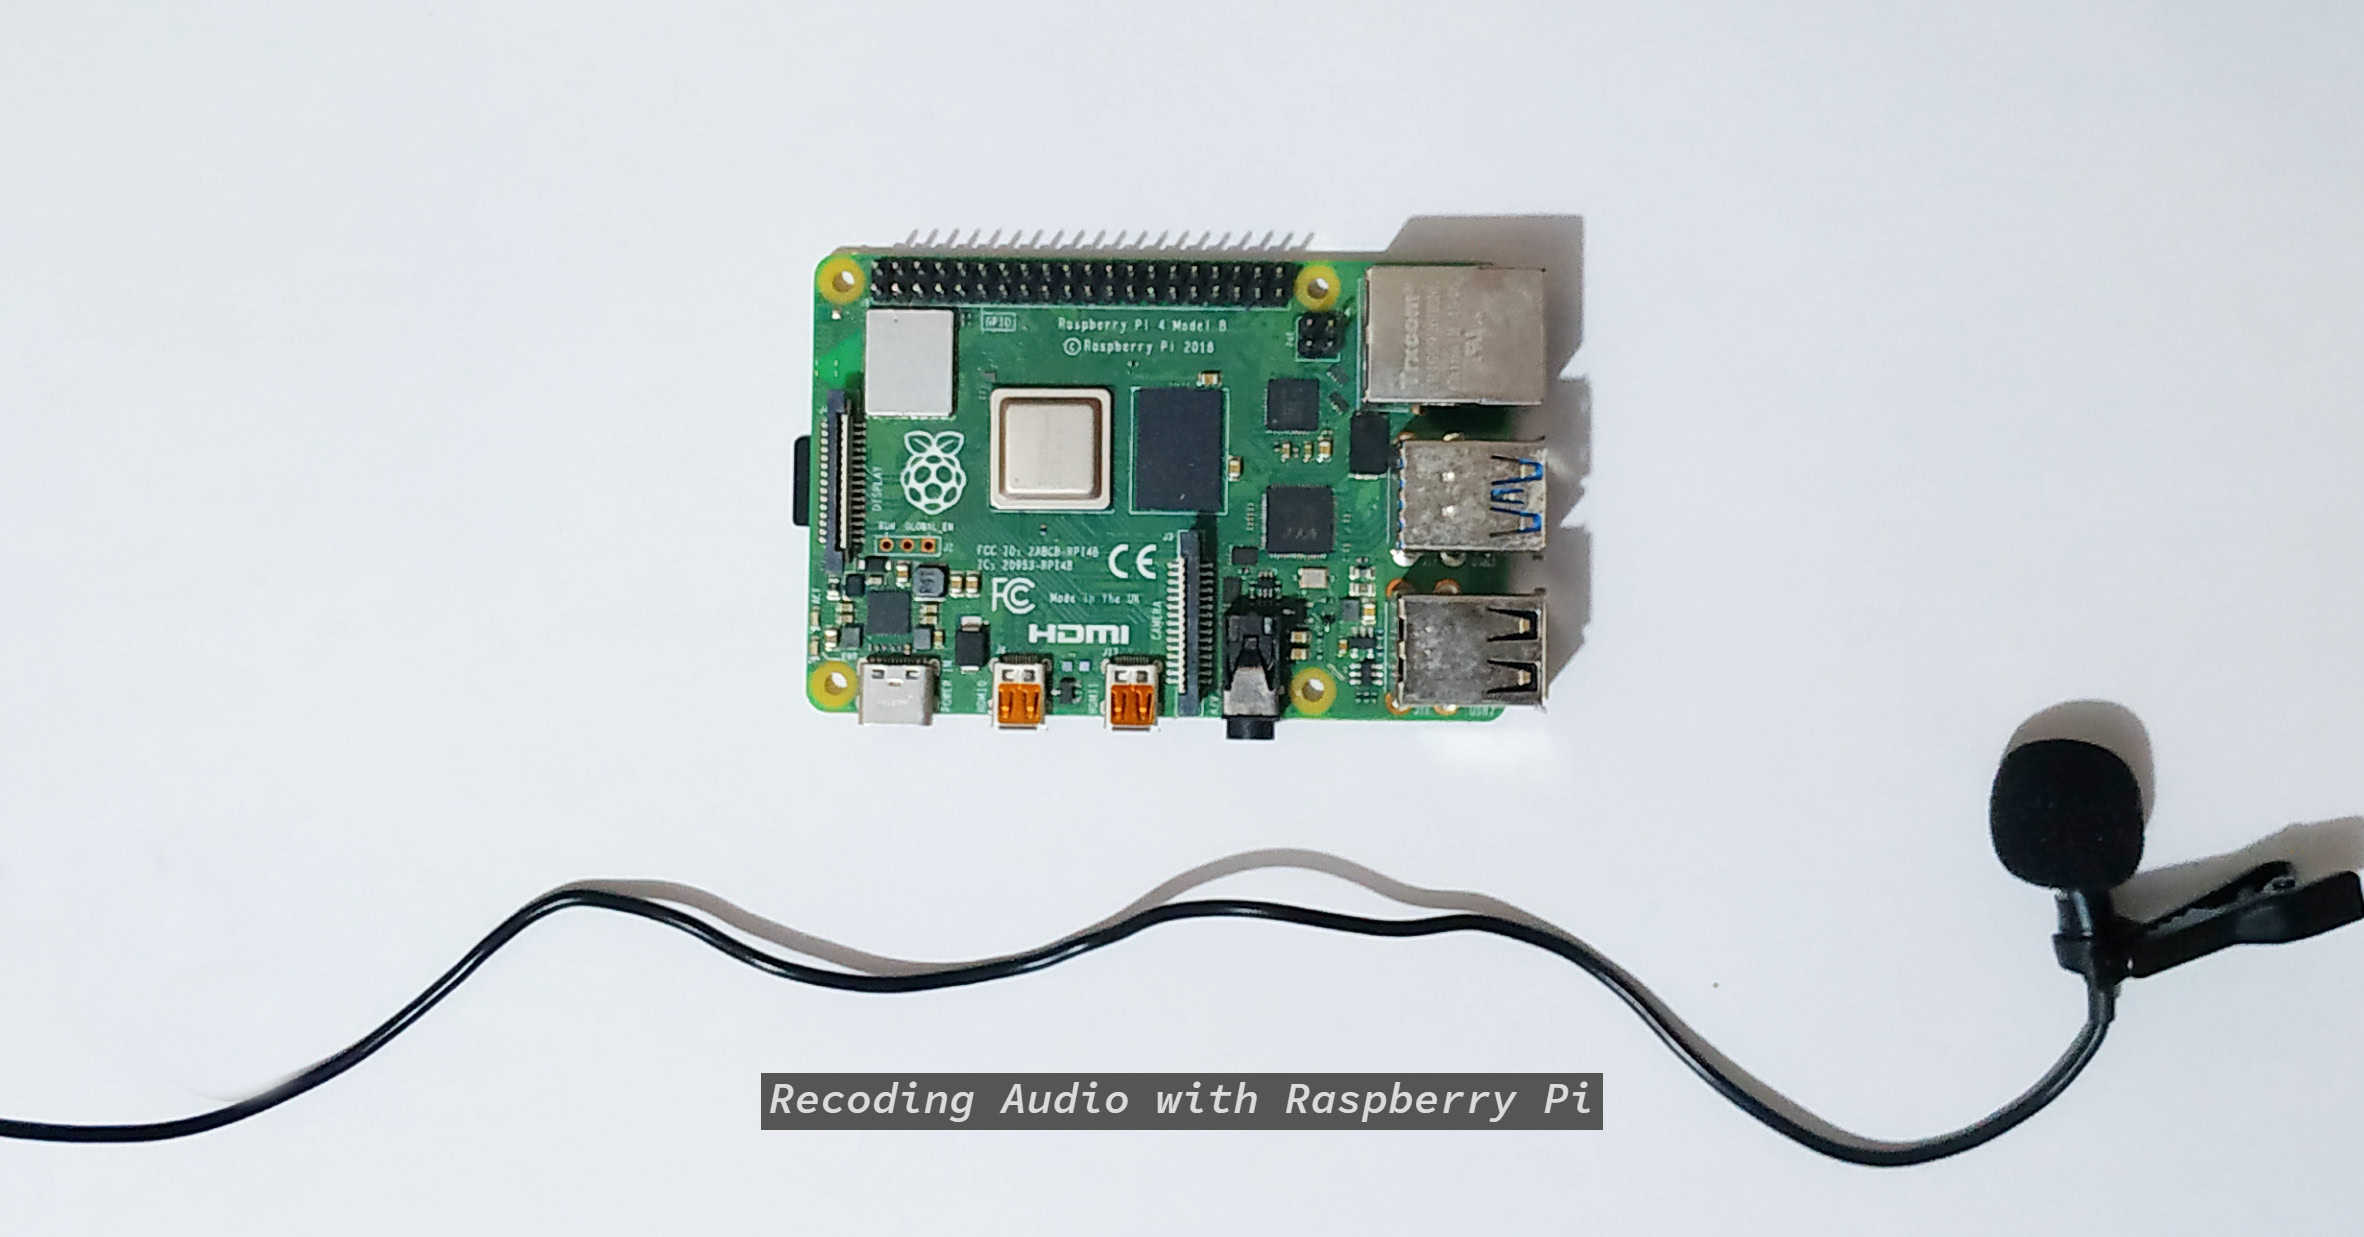
Recording audio with the Raspberry Pi opens up a wide variety of audio-based applications like voice recognition, voice control, and security systems.

In this tutorial, we will walk through the steps of setting up a USB microphone on the Raspberry Pi, then see how to record audio from the microphone.
How to Connect a Microphone to the Raspberry Pi
There are three ways you can connect a microphone to the Raspberry Pi:
- External sound card
- Bluetooth
- USB
External Sound Card
The first option is to connect a microphone through the microphone jack on an external sound card like the Audio Injector Sound Card. This is a Raspberry Pi HAT that sits on top of the Raspberry Pi. The microphone can be connected to the sound card with standard RCA plugs. This method will give the best audio quality.
Bluetooth
The second way to connect a microphone to the Raspberry Pi is with Bluetooth. Bluetooth microphones are the most seamless way to add a microphone as they don’t require a physical connection. Compatibility issues and unpredictable audio quality are downsides to using Bluetooth microphones. But the convenience of having a wireless microphone might make them worthwhile.
USB
USB microphones are probably the most reliable way to record audio with a Raspberry Pi. They are mostly plug and play, and work without any additional hardware or software. The sound quality of USB microphones can range from poor to professional quality. It all depends on the quality of your microphone. For example, a Blue Yeti USB microphone (around $100) records much higher quality sound than a generic USB microphone ($15).
How to Record Audio From the Microphone
Setting up a USB microphone using the Raspberry Pi Desktop is easy. Once you connect the microphone to the Raspberry Pi, the microphone will be detected automatically.
Recording Audio From the Desktop
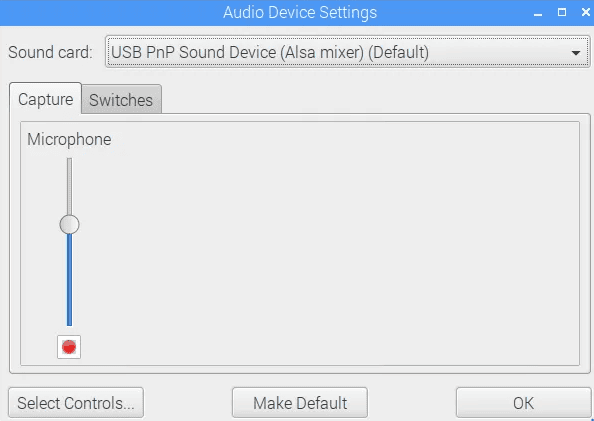
To record audio from the desktop, open the Audio Device Settings by going to Preferences > Audio Device Settings. There you can change the microphone amplification with a handy slide controller. Press the red record button to start recording audio:
Recording Audio From the Command Line
To record audio from the command line, first check the USB microphone’s connection by entering the following command:
lsusbYou should see an output similar to this:

Bus 001 Device 002 is the USB microphone. With other Raspberry Pi models, this could show 2 to 5 devices.
To see the list of audio input devices, enter:
arecord -lThis output should be shown:

So the microphone matches with card 1 and device 0. This will be mapped in the following with plughw:1,0.
Finally, we can start recording audio by entering the following command:
arecord -D plughw:1,0 --duration=60 test.wavThe term --duration=60 sets the duration of the recording in seconds. In this case the Raspberry Pi will record audio for 60 seconds. The recorded audio will be saved to the file “test.wav”.
The following output should appear:

Alsamixer
Sometimes the volume of the recording will be low. In these cases, Alsamixer can helps us manage the microphone volume with a simple interface.
To open Alsamixer, type the following into the Raspberry Pi terminal:
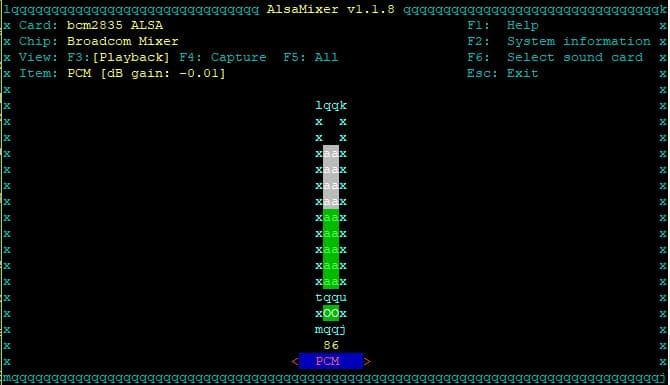
alsamixerYou’ll see the default console:
Now, you have to switch to the correct audio device by pressing F6:
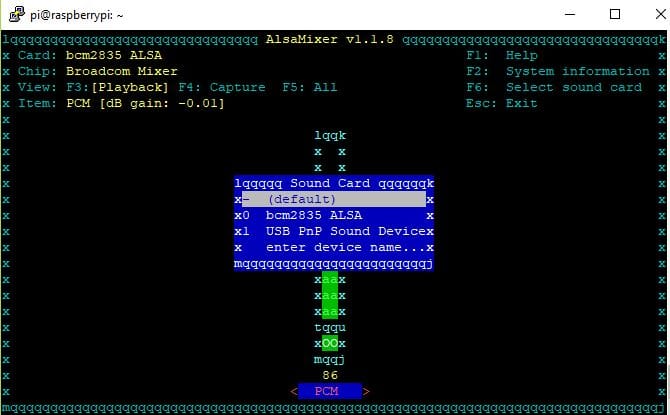
In my case, the correct sound card is the one marked as bcm2835 ALSA:

Now you can use the up and down arrow keys to change the volume of the microphone as needed. Press ESC to save and exit.
Hope this has helped you figure out how to record audio on the Raspberry Pi! Leave a comment below if you have questions about anything.