
Image editing on the Raspberry Pi is useful for editing large numbers of image files automatically. If you take a 24-hour time lapse with a resolution of 1 photo per 10 minutes, you would have 144 photos that might need editing.

In this article, we will use the Raspberry Pi to apply functions like cropping, resizing, brightness, and contrast to images taken with the Raspberry Pi camera module.
You can use either GIMP software or a Python library called Pillow.
GNU Image Manipulation Program
GIMP, also known as the GNU Image Manipulation Program, is a cross-platform image editor available for GNU/Linux, OS X, Windows, and more operating systems. It is open-source software, which means you can access the source code and make changes anytime you want, and it is free.
GIMP is typically seen as a free version of Adobe Photoshop. It is as equally robust as Photoshop and can handle professional grade image editing. Visit their official website to download the software and view the tutorials.
GIMP is the best option if you are editing images one at a time on the Raspberry Pi Desktop. But if you want to automate image editing to process tens to hundreds of images at the same time, you can use a Python program.
How to Automate Image Editing With Python
In this tutorial we will use a Python library called Pillow for image editing.
Pillow
Pillow is a Python library that allows you to open, manipulate, and save several image file formats. It is a developed fork of PIL (Python Imaging Library), the original image manipulation library for Python. PIL has been long outdated for modern applications. Its last update was way back in 2009. On the other hand, Pillow is updated regularly. It is also easier to install, runs on all major operating systems, and supports the latest Python version.
Pillow contains methods for basic image manipulation such as crop, rotate, resize, etc. It also provides basic image processing functionality, including point operations, filtering with a set of built-in convolution kernels, and color space conversions. Additionally, it also has a method for pulling out statistics from an image, which can be used for automatic contrast enhancement and global statistical analysis. Aside from that, it is also perfect for image archival and batch processing applications. You can use the library to create thumbnails, convert between file formats, print images, etc.
Let’s now take a dive on its basic functionalities.
Installing Pillow
First, to install Pillow, enter the following command
pip install PillowAlternatively, you can download the installation files on the official website. It is important to know that PIL and Pillow cannot work in the same environment, so be sure to uninstall PIL if you have it in your system.
pip uninstall PILOpening an Image
1. First, open the terminal and go to your target directory using the Linux command cd. For instance, if your image file is in Downloads and you’re at your home directory, use cd /home/Downloads.
2. Then, open an interactive shell by typing python on the terminal. Import the image module of Pillow using from PIL import Image as img. Take note that I renamed Image into img to make it easier to call into the succeeding methods.
3. Next, open your file using the open() method and store it into a variable (in my case, it’s “yourfirstimage”). You can now display the image by using the show() method. Once you enter the show line, your Raspberry Pi will show your Image using your default image viewer.
from PIL import Image as img

yourfirstimage = img.open("Sample.png")
yourfirstimage.show()
Rotating an Image
To rotate the image, simply use yourfirstimage.rotate(value). Use show() to display the output. Note that to display the rotated image, you need to store it in a new variable.
from PIL import Image as img

yourfirstimage = img.open("Sample.png")
newimage = yourfirstimage.rotate(45)
newimage.show()
Saving the Image File
To save the changes to an image file, simply use the save() method. You can create a new file by specifying a different name inside the parentheses.
from PIL import Image as img

yourfirstimage = img.open("Sample.png")
newimage = yourfirstimage.rotate(45)
newimage.save("Rotated Image.png")
Cropping an Image
Similarly, to crop an image, use the crop() method. The crop method uses a rectangular portion, described by a four-element tuple (basically 4 elements inside parentheses), to crop an image. These elements are coordinates left, upper, right, and lower, creating two points (left, upper) and (right, lower). Suppose we have a 1000×500 pixel image, the image’s left upper point is (0, 0), and the right lower point is (1000, 500).
To crop our image in half, we will first determine its size using size().
from PIL import Image as img
firstimage = img.open("Sample.png")
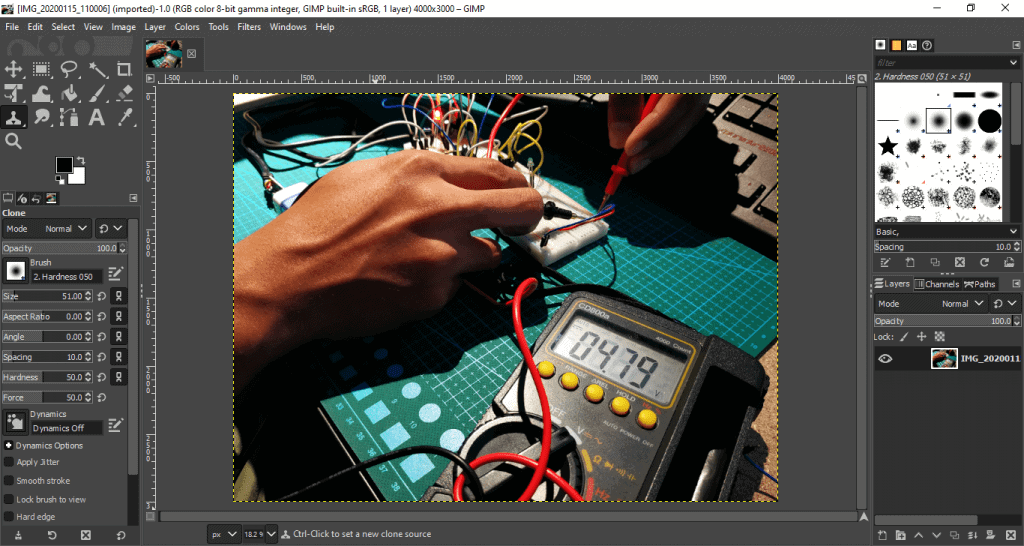
firstimage.sizeMy sample image has a size of (4000, 3000). So to crop it in half, I need my four-element tuple to be (2000, 0, 4000, 3000). The first point will be on the 2000th pixel starting from the upper left corner of the image, and since the upper coordinate is zero, it stays on the first top. The second point will be on the bottom right corner of the image. Think of it like cropping with a GUI. You first drag the rectangle from a point to another to select the portion you want to crop.
from PIL import Image as img

firstimage = img.open("Sample.png")

newimage = firstimage.crop((2000,0,4000,3000))
newimage.show()
newimage.save("Cropped Image.png")
Resizing an Image
Since we already dabbled on the image size, let’s now resize the whole image with the resize() method. We know size() gives a two-element tuple that contains the length and width of the image so we simply multiply it with the ratio we like. For instance, if you want to resize the image in half, multiply it by 0.5.
from PIL import Image as img

firstimage = img.open("Sample.png")

newimage = firstimage.resize((round(firstimage.size[0]*0.5), round(firstimage.size[1]*0.5)))
newimage.show()
I know I said resize it in half, but my sample image was bigger than I thought, so I made the multiplier 0.1 to make the changes visible.
Accessing Image Data
Aside from knowing the size of an image, the following methods are used to know the image filename, format, mode, width, height, and info.
- Image.filename
This function is used to get the file name or the path of the image.
>>>image = Image.open('circuitbasics.jpg')
>>> image.filename
'circuitbasics.jpg'- Image.format
This function returns with file format of the image file like ‘JPEG’, ‘BMP’, ‘PNG’, etc.
>>> image = Image.open('circuitbasics.png')
>>>
>>> image.format
'PNG'- Image.mode
It is used to get the pixel format used by the image. Typical values are “1”, “L”, “RGB” or “CMYK”.
>>> image.mode
'RGB'- Image.size
It returns the tuple with the height and weight of the image.
>>> image.size
(1200, 628)- Image.width
It returns only the width of the image.
>>> image.width
1200- Image.height
It returns only the height of the image.
>>> image.height
628- Image.info
It returns a dictionary holding data associated with the image.
>>> image.info
{'jfif': 257, 'jfif_version': (1, 1), 'dpi': (300, 300), 'jfif_unit': 1, 'jfif_density': (300, 300), 'exif': b"Exif\x00\x00MM\x00*\x00\x00\x00
....
....
\xeb\x00\x00'\x10\x00\x00\xd7\xb3\x00\x00\x03\xe8"}
Adding Filters
There are also pre-defined filters in the Pillow library that are accessible via the ImageFilter module. Here is an example:
from PIL import Image, ImageFilter

firstimage = img.open("Sample.png")

newimage = firstimage.filter(ImageFilter.BLUR)
newimage.show()
The current version of pillow library provides the following set of predefined image enhancement filters:
- BLUR
- CONTOUR
- DETAIL
- EDGE_ENHANCE
- EDGE_ENHANCE_MORE
- EMBOSS
- FIND_EDGES
- SHARPEN
- SMOOTH
- SMOOTH_MOR
These are the basic image manipulation functionalities of Pillow. There’s more to the library than basic resizing, filtering, and rotating. You can read more about it in Pillow’s official documentation.
Hope this article has helped you get started editing images on the Raspberry Pi. Feel free to leave a comment below if you have questions about anything!


