In this tutorial we will learn how to use the Raspberry Pi camera module to take pictures and videos from the terminal or from a Python program. By the end of this article, you will be able to use the Raspberry Pi’s camera module in any project.

Overview of the Raspberry Pi Camera Module
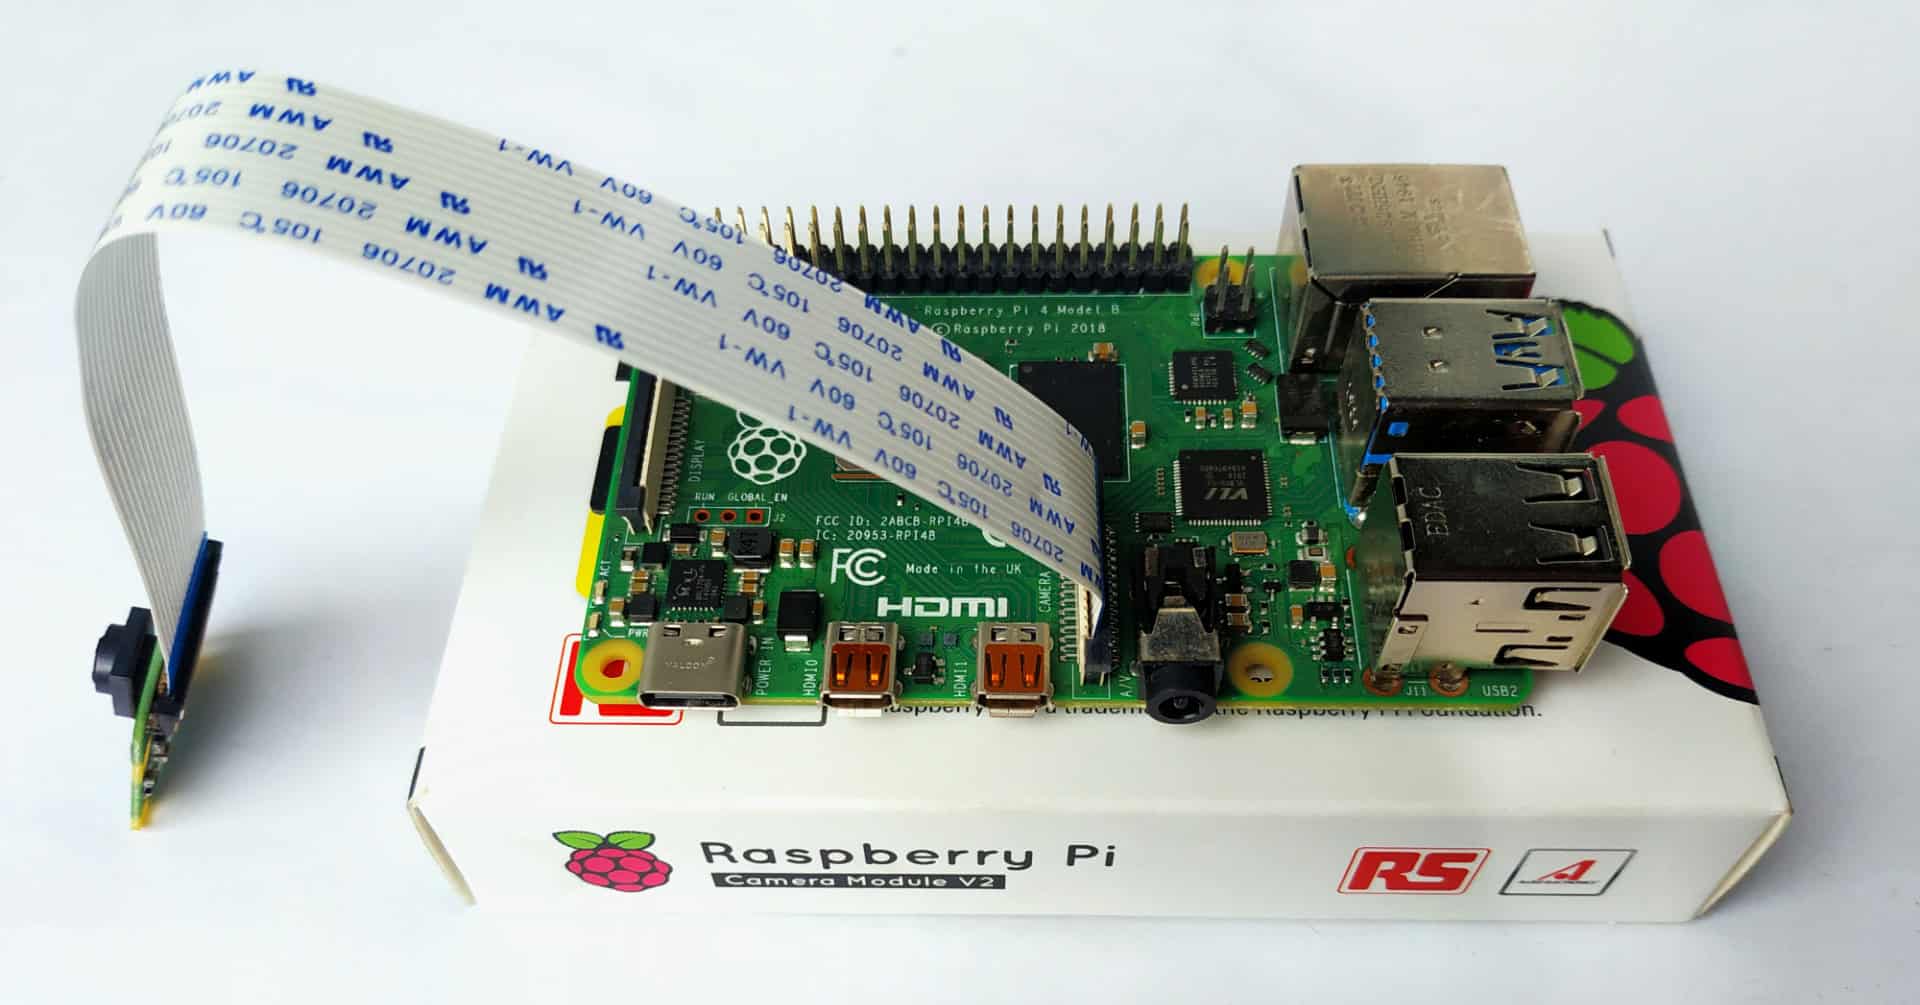
The resolution of the camera module depends on the board version. In this tutorial we will use v2, which uses an 8MP Sony IMX219 sensor. Version one uses a 5MP OmniVision OV5647 sensor.
The Raspberry Pi camera module supports 1080p30, 720p60, and VGA90 video modes as well as still captures. It works with all previous versions of the Raspberry Pi.
Connecting the Camera
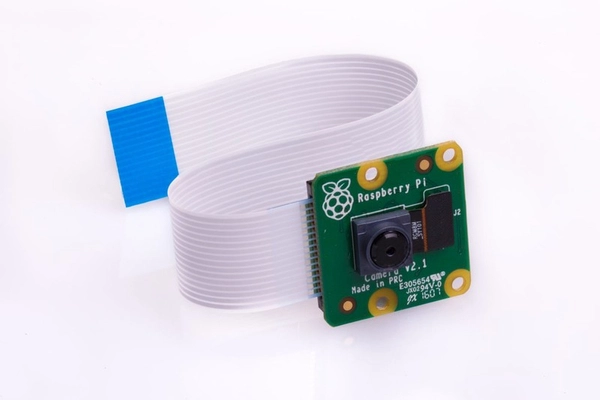
1. Make sure the Raspberry Pi is disconnected from power when installing the camera.
2. Pull up on the edges of the plastic clip on the Raspberry Pi’s camera port.
3. Insert the camera’s ribbon cable into the camera port. The metal traces on the camera cable should face the metal pins on the Raspberry Pi’s camera port.
4. Gently push the clip back into place. The camera cable should fit tightly so that it won’t slide out if pulled.
Now that the camera is connected, we will setup the Raspberry Pi so that it can communicate with the camera module.
Setting Up the Camera
1. First, startup your Raspberry Pi.
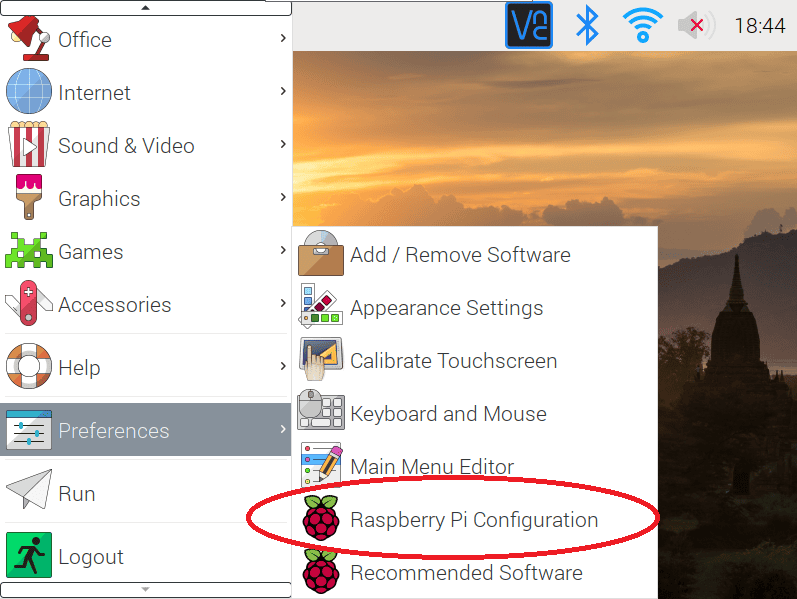
2. Open the Raspberry Pi Configuration tool using either the main menu or the command line. In the main menu, you can find it under Preferences:
Otherwise, enter this command on the terminal:
sudo raspi-config3. Next, select Interfaces. The camera is disabled by default. Enable it then save the changes to raspiconfig.
4. Now restart your Raspberry Pi.
Using the Terminal to Take Pictures and Videos
The easiest way to use your camera is from the terminal. Open the terminal up from the menu bar and enter the following commands:
To take a photo:
raspistill -o home/pi/image.jpgThe raspistill command captures the photo after a five second preview (enough time to get ready for the picture). You must include the path and the target filename of your photo with the command, or else it will not work.
To take a video:
raspivid -o home/pi/video.h264On the other hand, the raspvid command records a 5-second clip and saves it to your target directory. You also need to include the path or else it does not work. Furthermore, you can change the resolution of your image and video by adding -w and -h switches. For instance:
raspistill -o home/pi/image.jpg -w 1024 -h 768raspivid -o home/pi/video.h264 -w 1024 -h 768Using Python to Take Pictures and Videos
Another way to control the camera is by using Python. In this example we will use the picamera Python module to control the camera. Next, initialize the camera using the PiCamera() function. Your program should look like this:
from picamera import PiCamera
camera = PiCamera()
To start sending data to your Raspberry Pi, add camera.start_preview(). If your preview is reversed, rotate by 180 degrees using camera.rotation = 180. The value of camera.rotation is changeable. So if you need to orient your preview to an unusual degree, you technically can, but I advise not to because it might mess up your image.
To take a photo:
Note that if you’re coding Python using the terminal’s interactive shell, the screen will get replaced by your camera’s output. To exit, press CTRL + Z.
Finally, to take a picture, simply use camera.capture('path/path/desiredfilename.jpg').
camera.start_preview()
time.sleep(5)
camera.capture('/home/pi/Desktop/image.jpg')
camera.stop_preview()
You can import the time module to replicate what we did using the terminal. Add a 5-second delay so that you have time to prepare. Always include camera.stop_preview() after you are done with the camera.
To take a video:
The way you take a picture and record a video using PiCamera is very similar. You need not remove the start and stop preview functions. You just replace camera.capture by camera.start_recording('path/path/desiredfilename.h264') and camera.stop_recording().
camera.start_preview()
camera.start_recording('path/path/desiredfilename.h264')
time.sleep(5)
camera.stop_recording()
camera.stop_preview()
Use the delay to indicate the duration of your video recording.
How to Make an Image Time Lapse
Image time lapses are great for showing events that occur over a long time span. Pictures are taken at long intervals (hours to days), then assembled into a short video that shows the process at high speed. For example, image time lapses can be used to film a plant growing or the change of seasons in a forest.
The Python program below will take a photo every 30 seconds in 1024 x 768 resolution:
from picamera import PiCamera
from time import sleep

picamera = PiCamera()
timeinbetween = 30

with picamera.PiCamera() as camera:
    camera.resolution = (1024, 768)
    for filename in camera.capture_continuous('/home/pi/time-lapse/img{timestamp:%H-%M-%S-%f}.jpg'):
        sleep(timeinbetween)
Note that the resolution is often modified in time-lapse programs, especially if the time in between pictures is short. If the wait time is short, more photos are taken, and if these pictures are big, they will fill up your storage faster than you could expect.
Hope this article has helped you setup the camera module on the Raspberry Pi! Leave a comment below if you have any questions.

Great post! I love the step-by-step instructions and the clear explanations. Can’t wait to try capturing some time-lapse videos with my Raspberry Pi!
Great post! I never thought of using a Raspberry Pi for photography and video. The step-by-step instructions were super helpful, and I can’t wait to try this out with my Pi. Thanks for sharing!