Security, automation, and robotics systems rely heavily on motion detection sensors. There are several different types of motion sensors, but we will focus mainly on infrared sensors in this tutorial. We will discuss how these sensors work, and how to connect them to a Raspberry Pi. Finally, we will build an example project to demonstrate how to activate a 5V relay when the infrared sensor detects motion.

Passive Infrared Sensors
Passive infrared (PIR) sensors are devices that are used to detect motion. Sometimes they are referred to as pyroelectric sensors. As the name suggests, the devices are passive sensors, which means that the sensor does not use energy to detect infrared light.
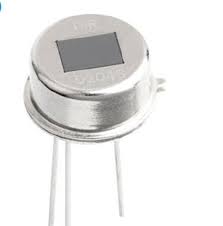
A pyroelectric sensor consists of an electrically polarized crystal that generates an electric charge when exposed to infrared radiation. All animals emit infrared radiation, so PIR sensors can be used to detect the motion of humans and other large animals.
The white dome on top of the PIR sensor is a Fresnel Lens. This lens focuses the infrared signals onto the pyroelectric sensor so that the module can detect weak signals from far distances. It also extends the sensor’s field of view.
How PIR sensors work
Motion Detection
The sensing element consists of crystals that respond to changes in infrared energy. The sensing element is split into two parts – sensing element A and sensing element B:
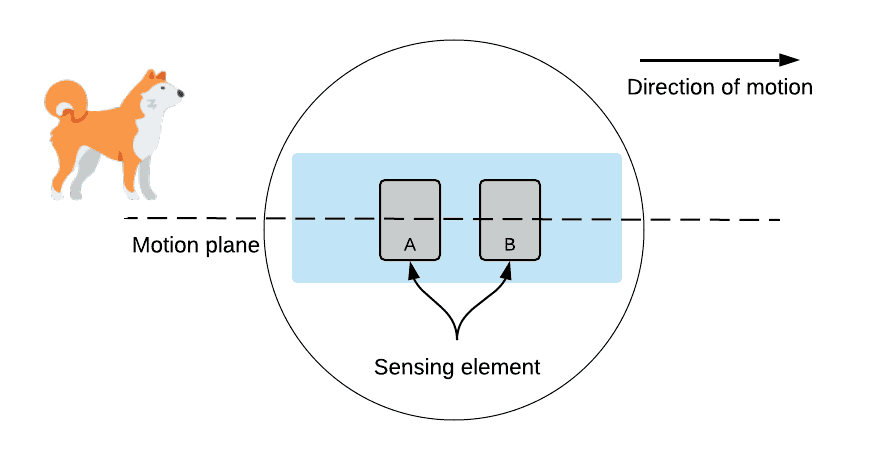
When nothing is moving, the two sensing elements detect the same infrared levels and cancel each other out. When an infrared emitting object like a dog moves into the sensor’s field of view, sensing element A detects the infrared light first. This causes a positive differential change between the two sensing elements because the infrared light level hitting sensor element B is still low.
When the object passes the sensor, the infrared light level hitting sensor element B will be higher than element A, which causes a negative differential change between the two sensing elements. This potential difference is detected and amplified by an onboard logic chip (the BISS0001), and turned into a digital signal that can be detected by the Raspberry Pi.
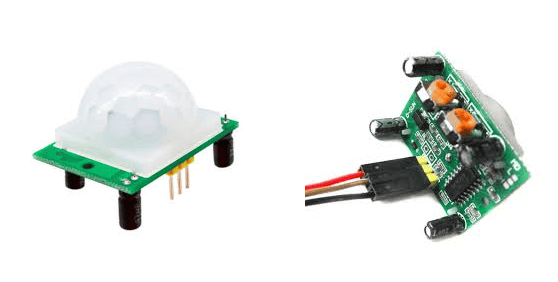
Overview of the HC-SR501 Passive Infrared Sensor
The HC-SR501 PIR sensor is a very popular passive infrared sensor among Raspberry Pi developers. It has the pyroelectric sensor, control chip, voltage regulator, tuning potentiometers, and pin connections on one small PCB:
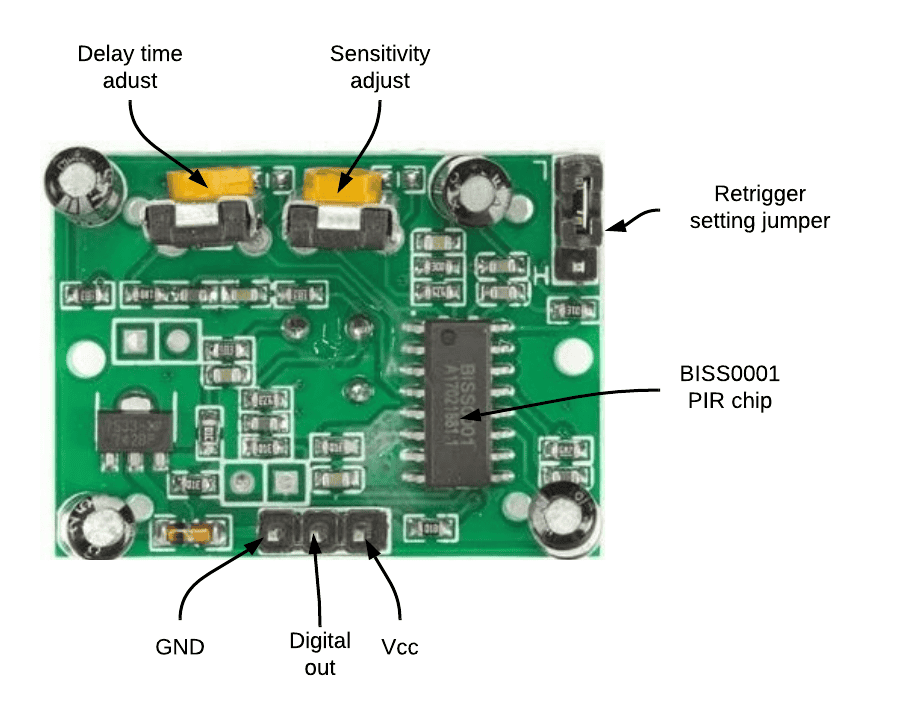
- The module has three pins: Ground and Vcc for powering the module. The Digital Out Pin gives a high logic level as a target moves within the sensor’s range.
- Delay time adjust. The first potentiometer adjusts the delay time. This is the time the output signal stays HIGH if the PIR detects motion. This time can range from 0.3 seconds to 5 minutes. Turning the potentiometer clockwise or right increases the delay time. Consecutively, turning the potentiometer counterclockwise or left decreases the delay time.
- Sensitivity adjust. The second potentiometer on the board is the sensitivity adjustment. We use this potentiometer to control the sensing range, which is approximately 3-7m. Turning this pot clockwise or right decreases the range, while turning it counterclockwise or left increases the sensing range.
- Trigger settings. There are two operational modes:
- Single trigger or non-repeatable mode: Here, when the sensor output is high and the delay time is over, the output will change from a HIGH to a LOW level.
- Repeatable trigger mode: This mode will keep the output high all the time until the detected object moves out of the sensor’s range.
How to Connect a PIR Sensor to the Raspberry Pi
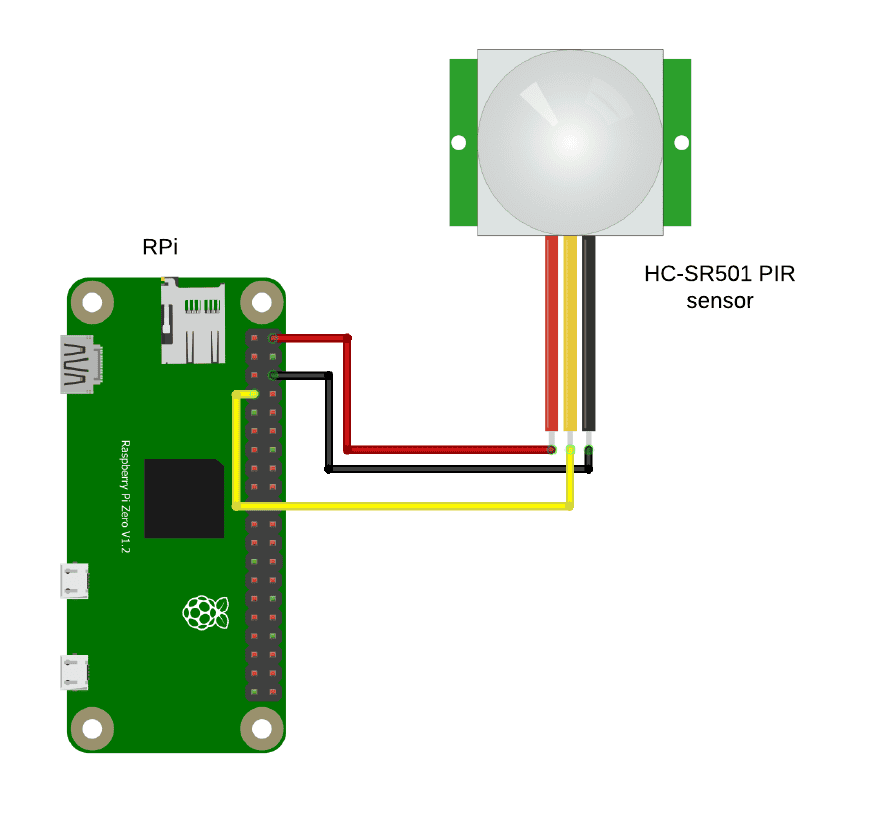
Before we build the example project, let’s see how to connect the PIR sensor to the Raspberry Pi on its own.
These are the parts you will need:
Connect the PIR sensor to the Raspberry Pi following this wiring diagram:
Programming the PIR Sensor with Python
We are going to use the gpiozero MotionSensor class to read data from the module. Here is a starter code to interface the PIR sensor with the Raspberry Pi. If you do not have the gpiozero library installed, it’s time to do so now. Just use the command sudo apt install python3-gpiozero, and you are good to go.
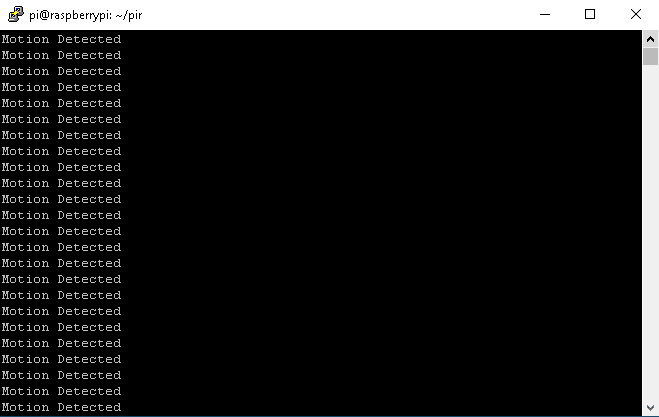
In this program we will print “Motion detected!” to the terminal when motion has been detected. Here’s the Python code:
from gpiozero import MotionSensor

pir = MotionSensor(4)

while True:
	pir.wait_for_motion()
	print("Motion detected!")
The gpiozero MotionSensor library makes it easy to develop sensor applications on the Raspberry Pi. This library has several functions such as waiting for a motion, what to do when the sensor detects motion, and what to do when no motion is detected. For our motion detection system, we import the MotionSensor library using the code: from gpiozero import MotionSensor. We use the digital pin 4 for reading data from the PIR sensor: pir = MotionSensor(4). Then, we enter an infinite loop that waits for the presence of motion within the sensor’s range using pir.wait_for_motion(). Finally, we take action when the PIR sensor’s state changes.
This is what the terminal output should look like when motion is detected:
Control a 5V Relay With a PIR Sensor
In this example project, we will activate a 5V relay when the PIR sensor detects motion.
We will need the following parts:
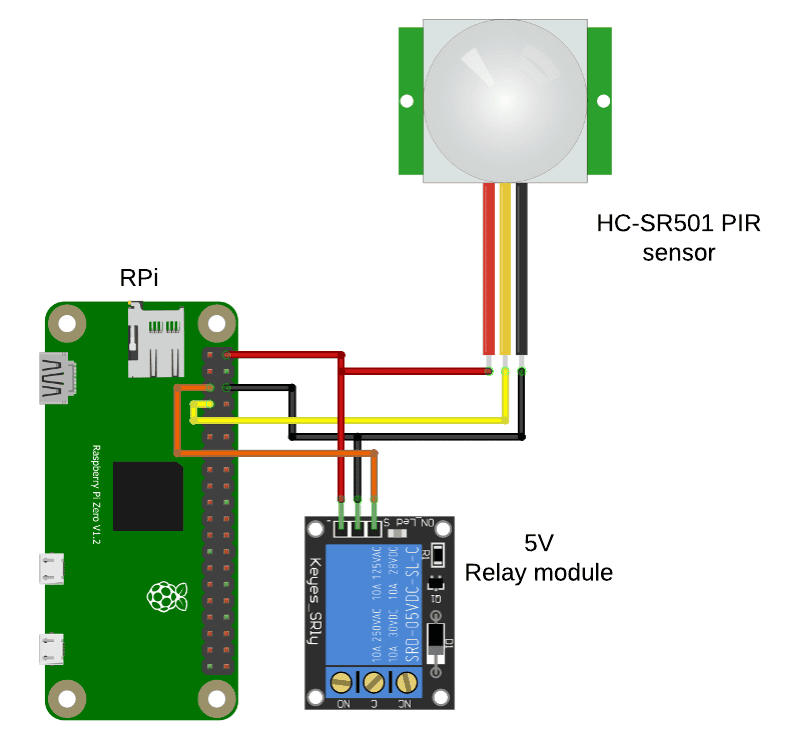
For more information about using 5V relays on the Raspberry Pi, check out our tutorial on How To Use 5V Relays With the Raspberry Pi.
Python Code for PIR Sensor Controlled 5V Relay
This code will activate the 5V relay when the PIR sensor detects motion:
from gpiozero import MotionSensor, LED
from time import sleep

pir = MotionSensor(4)
relay = LED(17)

while True:
  pir.when_motion = relay.on
  pir.when_no_motion = relay.off
Code Description
We follow the same setup as we did before, but for this example, we are going to import an additional library from gpiozero. We import the LED library and attach an instance of the LED to pin 17 of the Raspberry Pi. This will act as our output pin: relay = LED(17). The input pin of the motion sensor remains unchanged on pin 4: pir = MotionSensor(4). The LED library will also help us to change the state of the output pin when the sensor detects motion: pir.when_motion = relay.on. To make sure that the output remains LOW when we do not have motion, we use: pir.when_no_motion = relay.off. Finally, schedule the Python script with cron for running soon after boot. You can refer to this article for scheduling tasks with cron.
Using the PIR Sensor
You might need to experiment with the placement of the sensor and the sensitivity of the sensor to get the response you desire. But once these sensors are properly configured, they are very reliable!
Hope this tutorial has helped you to understand how to setup a passive infrared sensor on the Raspberry Pi. Let us know how it worked for you. And feel free to leave a comment below if you have questions about anything.