Most programs require human input to work. And to send these instructions to the computer, people use peripheral devices like a keyboard and a mouse. In this tutorial, we will learn how to detect keyboard and mouse input using Python on a Raspberry Pi.

Detecting Keyboard Input
A simple Google search reveals Python modules that support keyboard and mouse input detection on a Linux system. There’s the keyboard module, ncurses, etc. Unfortunately, they all have characteristics that make them hard to implement on a Raspberry Pi. For instance, the keyboard module requires root user privileges.
I tried a few of these methods, and for me, using the standard sys and pygame modules are the easiest to use. Let’s talk more about them in the next section.
The sys Module
The sys module provides functions that control particular aspects of the Python runtime environment. It comes as a default to the Python package, so no need to install explicitly.
The main function that we’re going to use from this module is stdin. It is used by the Python interpreter to gain access to the standard input stream. If you’re not familiar with the standard input stream, think of it as a part of a communication channel between a program and its development environment. The whole channel consists of the standard input, standard output, and standard error streams. Stdin accepts text input while Stdout and Stderr get data from the output. A Linux-based system instantly creates these three streams when you execute a command/program.
Code for Keyboard Input
import tty, sys, termios

filedescriptors = termios.tcgetattr(sys.stdin)
tty.setcbreak(sys.stdin)
x = 0
while 1:
  x=sys.stdin.read(1)[0]
  print("You pressed", x)
  if x == "r":
    print("If condition is met")
termios.tcsetattr(sys.stdin, termios.TCSADRAIN, filedescriptors)
Code Explanation
Firstly, import the sys module along with tty and termios modules. Both tty and termios modules are required to make sure the terminal reads the input per character.
Let’s tackle things line by line.
We use termios.tcgetattr(sys.stdin) to retrieve the current settings of the terminal on the stdin stream. It stores them to variable name filedescriptors.
Then, we modify the input stream using tty.setcbreak(sys.stdin). On a Linux system, command-line input is set to cooked mode as default. Cooked mode lets you enter words in the terminal. It makes the terminal wait for a newline character (/n) before processing the input. This is why anything you type into a terminal won’t run unless you press enter. We need to change it to raw mode to accommodate single-character commands. We do this with the Python function tty.setcbreak. Simply put, it calls down the tty driver to tell it to stop buffering.
Thanks to tty.setcbreak, every keypress now gives an output. Our next problem, however, is deactivating raw mode when it leaves the main loop. We need termios.tcsetattr to do this. Remember the filedescriptors variable we made earlier? Since it contains the original settings of the tty driver, we only need to tell that to the termios.tcsetattr to revert to cooked mode.
Using the pygame module
Alternatively, the pygame module can be handy. Pygame, as the name suggests, is a Python module explicitly made to create games. It’s a straightforward library that contains functions for drawing graphics, playing sounds, and handling keyboard and mouse input.
The main difference between sys and pygame is that sys uses a CLI (Command-Line Interface) while pygame uses a GUI (Graphical User Interface).
This is also the reason why only pygame can detect mouse input between the two. CLI is ideal for a minimal setup like a headless configuration (doesn’t require an external computer monitor). A headless configuration only uses a keyboard temporarily when debugging or adding a feature. A mouse is not necessary since most CLI cannot detect the movements of a mouse.
On the other hand, an external monitor is necessary for pygame to work. Without it, you can’t send keyboard and mouse input, or anything else for that matter.
With that, let’s move on to detecting keyboard and mouse input using the key, mouse, and get_pressed functions.
Code for Keyboard Input Using KEYDOWN
import pygame
pygame.init()
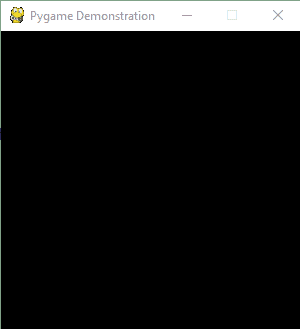
window = pygame.display.set_mode((300, 300))
pygame.display.set_caption("Pygame Demonstration")
mainloop=True
while mainloop:
for event in pygame.event.get():
if event.type == pygame.QUIT:
mainloop = False
if event.type == pygame.KEYDOWN:
print(pygame.key.name(event.key))
if event.key == pygame.K_r:
print('If condition is met')
pygame.quit()The first three lines besides import are required for all Pygame programs. They initialize, set the dimensions, and label the Pygame window. The main loop waits for an event to happen and checks if it’s a pygame.KEYDOWN event. KEYDOWN means that a keyboard button is pressed. It’s similar to the KEYUP event, which triggers when a keyboard button is released. If it’s a KEYDOWN event, it prints the key and checks if it’s the letter r. If it is r, it displays, “If condition is met”. pygame.QUIT tells the program to exit when the close button is pressed. If you forget to include pygame.QUIT, your Pygame window won’t close even if you press X several times.
Code for Keyboard Input Using get_pressed
import pygame

pygame.init()
window = pygame.display.set_mode((300,300))
pygame.display.set_caption("Pygame Demonstration")

mainloop=True
while mainloop:

    pygame.time.delay(100)
    for event in pygame.event.get():

        if event.type==pygame.QUIT:

            mainloop=False

        pressed = pygame.key.get_pressed()
        buttons = [pygame.key.name(k) for k,v in enumerate(pressed) if v]
        print(buttons)  # print list to console
        if pressed[pygame.K_r]:
            print("If condition is met")

pygame.quit()
Another way to detect a single key press is by using the get_pressed() function. The main difference between this and the former is that get_pressed() returns the status of every keyboard button everytime it is called. This is also the reason why we can’t use pygame.key.name to detect the key. We have to use a for loop to seek the button that returned HIGH after using the get_pressed() function.
Code for Mouse Input
import pygame

pygame.init()
window = pygame.display.set_mode((300,300))
pygame.display.set_caption("Pygame Demonstration")

mainloop=True
while mainloop:

    pygame.time.delay(10)
    for event in pygame.event.get():

        if event.type==pygame.QUIT:

            mainloop=False

        if event.type==pygame.MOUSEBUTTONDOWN:
            print("Mouse button is pressed")
            x,y=pygame.mouse.get_pos()
            print(x,y)

pygame.quit()
Lastly, to detect mouse input, we use the pygame.mouse functions. Our sample program displays “Mouse button is pressed” on the terminal when it detects a mouse click from the Pygame window. It also reveals the location of the click in x and y coordinates.
Hope this tutorial has helped you understand how to use the Raspberry Pi to detect keyboard and mouse inputs! Feel free to leave a comment below if you have questions about anything.


Great post and description of how to get instant keyboard input.
When I ran the code for keyboard input (the first example) with Python 3 on my Raspberry Pi, the terminal did not revert to “cooked” mode. It was a simple fix – the last line needs a space after the comma before “filedescriptors”
termios.tcsetattr(sys.stdin, termios.TCSADRAIN,filedescriptors)
Thanks for letting us know! I’ve just updated the code in the article.
Hi and thanks in advance
for the first example (keyboard input) I get the following error: error: (25, ‘Inappropriate ioctl for device’)
for the first line of code (filedescriptors = termios.tcgetattr(sys.stdin))
any idea?