Libraries are packages of code (mostly functions) that can be used to perform specific programming tasks. Libraries make programming on the Arduino a lot easier. They simplify and reduce the amount of code required in your program. Thousands of Arduino libraries are available to download for free, for a range of programming tasks like controlling LCD displays, driving servos, reading sensors, and more.

Before you can use a library’s code in your Arduino sketch, it needs to be installed on your computer. In this article, we will see how to install libraries from three of the most common sources for library code.
Watch the video for this tutorial here:
Arduino Core Libraries
The Arduino IDE comes with a set of pre-installed libraries for many common devices and programming tasks. These are the Arduino core libraries. The core libraries have great documentation and support, and the code is very reliable. For best results, use the core libraries whenever possible.
To see a list of all of the Arduino core libraries installed on your computer, open the Arduino IDE and navigate to Sketch > Include Library. If you click on one of the libraries, it will be included in the sketch.
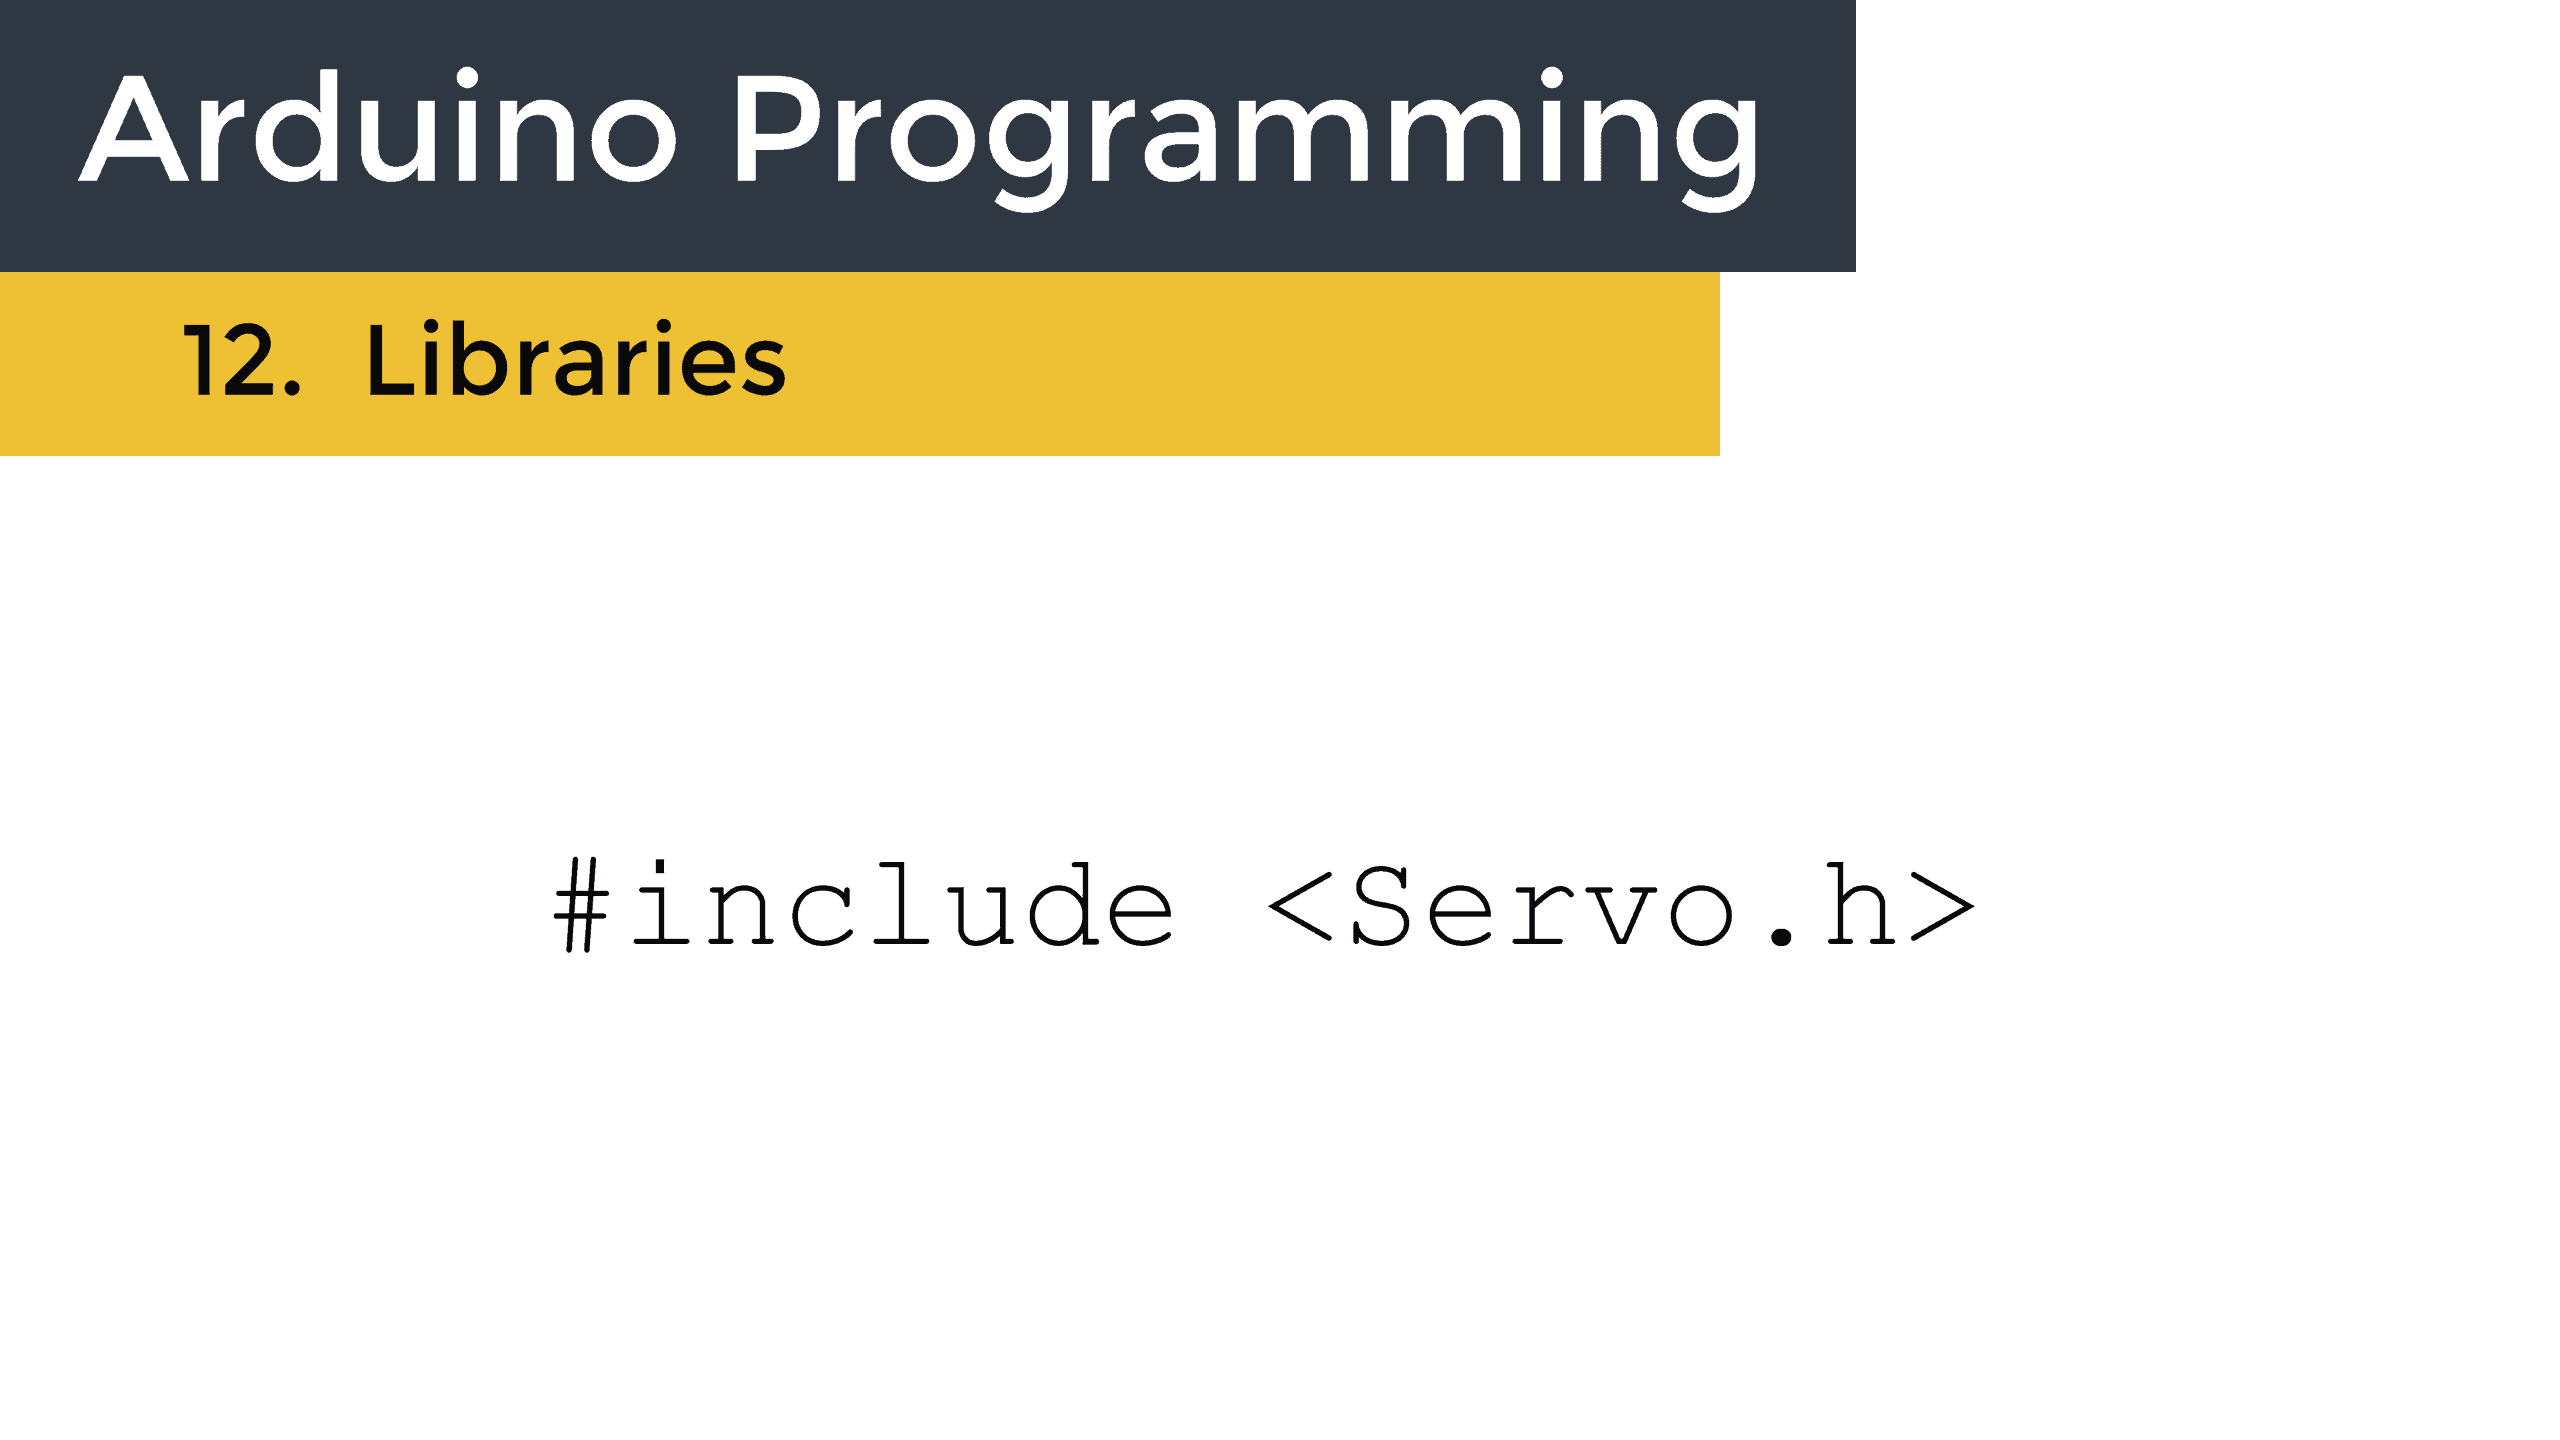
Including a library makes the library’s code available for use in the sketch. When a library is included in a sketch, the compiler will add all of the library’s code to the sketch before it’s uploaded to the Arduino. To include a library, use #include followed by the name of the library’s header file in angle brackets like this:
#include <Servo.h>Where Are the Library Files Installed on My Computer?
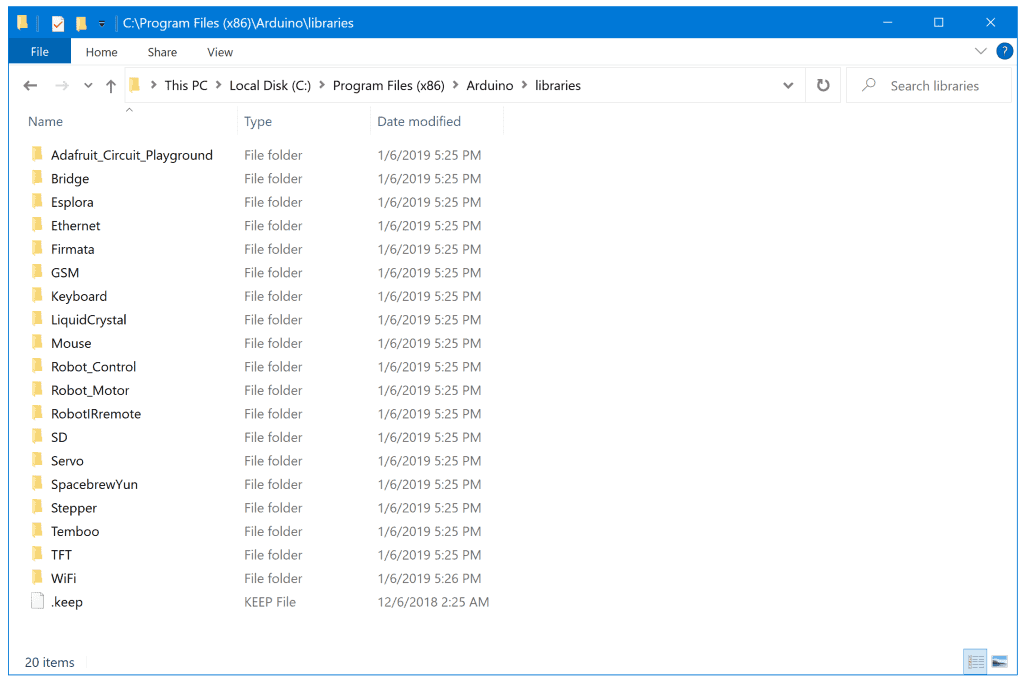
In Windows, the files for the core libraries are stored in the Arduino libraries folder. To find the folder, navigate to Local Disk (C:) > Program Files (X86) > Arduino > libraries.
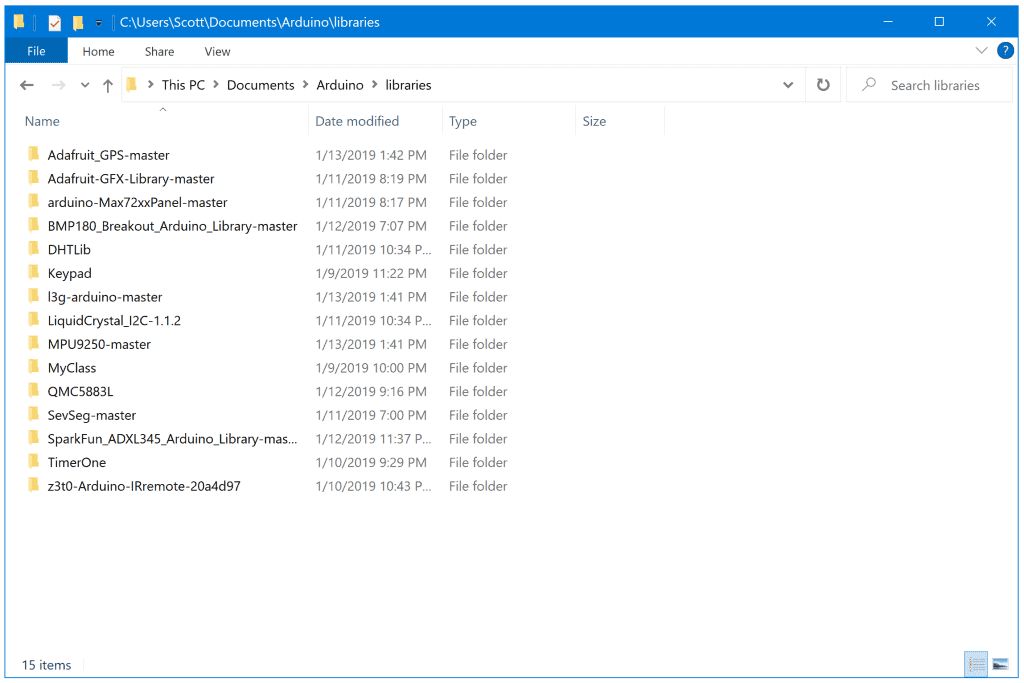
If you can’t find an Arduino core library that suits your needs, try searching online. Many websites have libraries that are available to download. In Windows, these libraries will need to be installed in the Documents folder on your computer. To find the folder, navigate to Documents > Arduino > libraries.
The Library Files
If you open the folder for any library, you’ll see the library files:
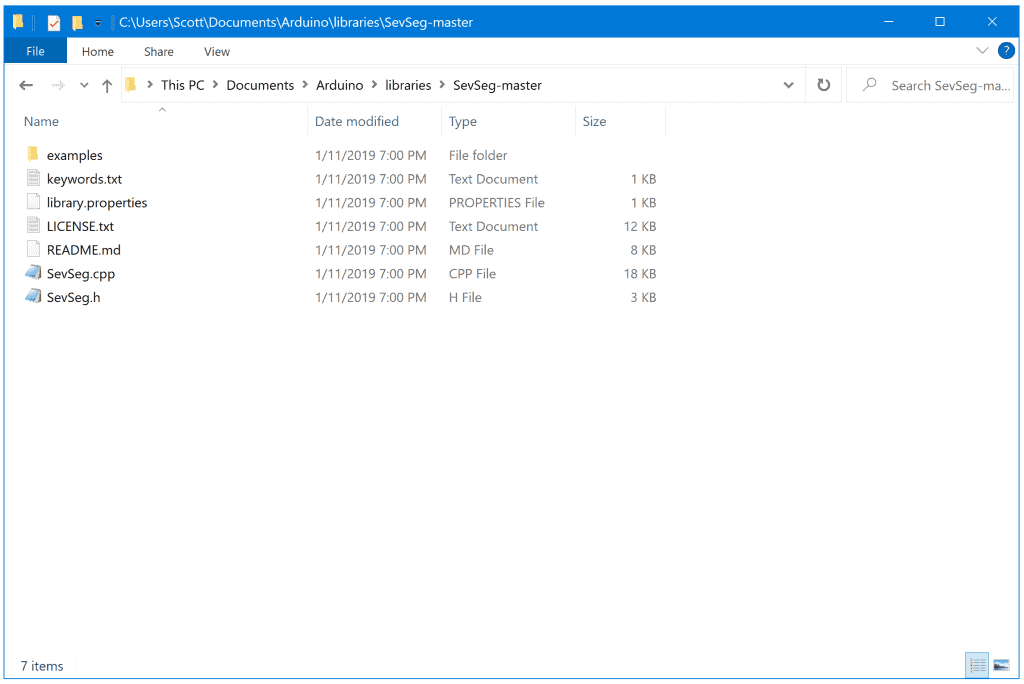
At a minimum, every library will have a header file with a .h extension and a source file with a .cpp extension. These two files contain the library code.
Some libraries have a readme.md file that has information about how to use the functions in the library. There also might be a license.txt file that has copyright and usage information. Many libraries have a library.properties metadata file. This file is used to display information about the library in the Arduino IDE’s Library Manager. There may also be a keywords.txt file, that tells the IDE which code should have colored text in the IDE.
Most libraries will also include a few example sketches, which are stored in the examples folder.
How to Install Libraries With the Library Manager
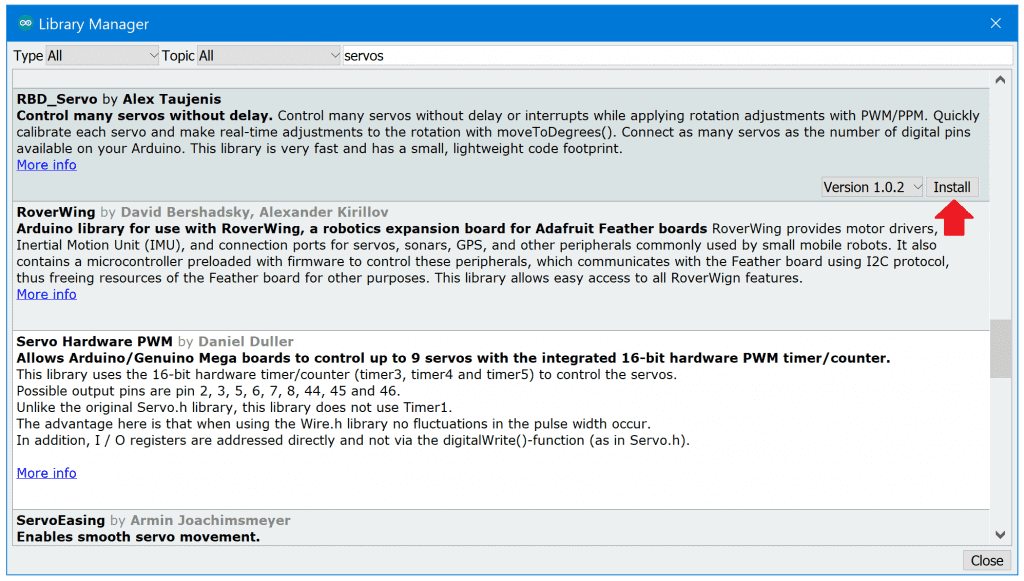
The Arduino IDE’s Library Manager has hundreds of libraries that can be installed on your computer with the click of a button. To find the Library Manager, navigate to Sketch > Include Library > Manage Libraries in the Arduino IDE. You’ll see a list of the libraries you can install. Click the Topic drop down menu to narrow down the choices. You can also use the search function to narrow it down even more.
To install libraries from the Library Manager, click on the library you want to install. Then click the Install button and the library will be installed on your computer:
How to Install Libraries from a ZIP File
Library code found online is commonly packaged in a ZIP file. To install a library packaged in a ZIP file, first download the ZIP file to your computer, then install the library from the Arduino IDE. In the IDE, navigate to Sketch > Include Library > Include .ZIP Library. Find the location where you saved the ZIP file and select it. Click Open. The library will be installed in the Documents > Arduino > Libraries folder.
How to Install Libraries from GitHub
GitHub is a popular place for Arduino developers to host their library code. There are two different ways to download and install library code from GitHub. The easiest way is to download a ZIP file of the library files:
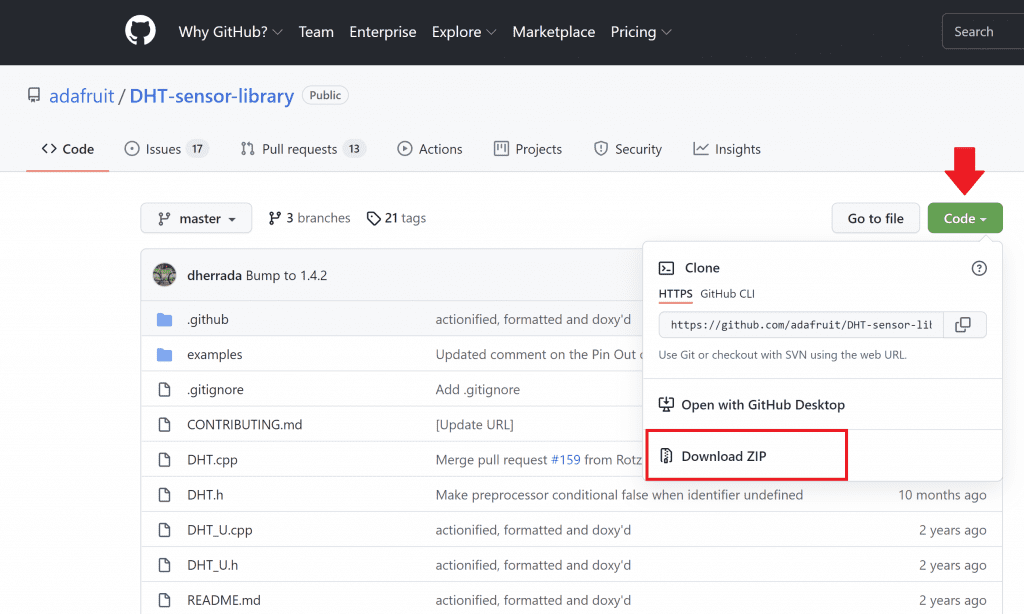
Click Download ZIP from the drop down menu. Once the ZIP file is saved on your computer, install it from the Arduino IDE by navigating to Sketch > Include Library > Add ZIP Library.
Some libraries don’t have an option to download a ZIP file. In these cases, the library’s source code needs to be pasted into a text file and saved as a library file on your computer.
How to Install Libraries from Source Code
To install a library from the source code, start by creating a new folder for the library in the Arduino Libraries folder. Navigate to Documents > Arduino > Libraries, and create a new folder with the name of the library.
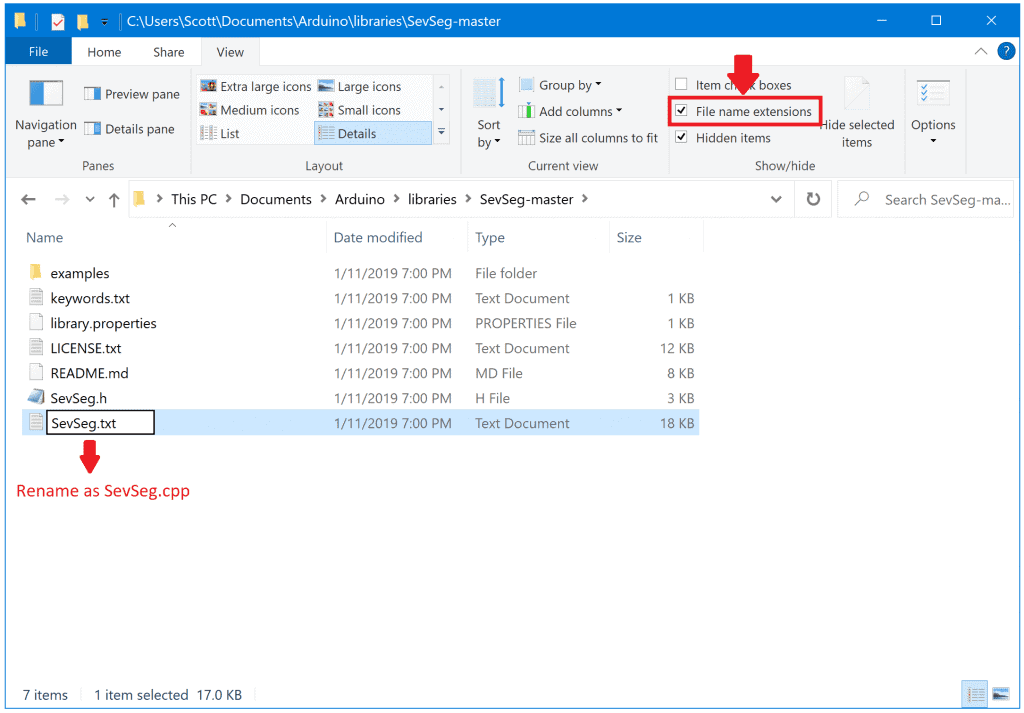
Copy the code for the source (.cpp) file and paste it into a text editor like Notepad. Save this as a .txt file in the library folder that was just created. Be sure to name the source file correctly, as it is referenced in the header file. The website providing the library code should have the correct name for the source file.
The code for the source file was saved as a .txt file, so the file extension needs to be changed from .txt to .cpp. To do this, navigate to the folder where the file is saved. Make sure the “file name extensions” option is checked in the View tab of the Windows explorer. Rename the .txt source file with a .cpp extension:
Now copy all of the code for the header file and paste it into a text editor like Notepad. Save the code as a .txt file in the new library folder. The header file also needs to be named a specific way since it’s referenced in the source file. The website hosting the library code should show how to name the header file.
The header file code was saved as a .txt file, so it needs to be renamed with a .h extension. Navigate to the folder where the header file is saved, then rename the file with a .h extension as explained above.
An Arduino library will work with just the source and header files. Most libraries will have other files and folders. These files can add useful features to the library, so they are worth downloading and installing as well. Just save them to the same folder as the other library files.
Hope this article on Arduino libraries was helpful… Just leave a comment below if you have questions about anything!


Use Notepad+ to view with move detail and ease of reading.
Notepad+ is a great code editor.
Windows users only?