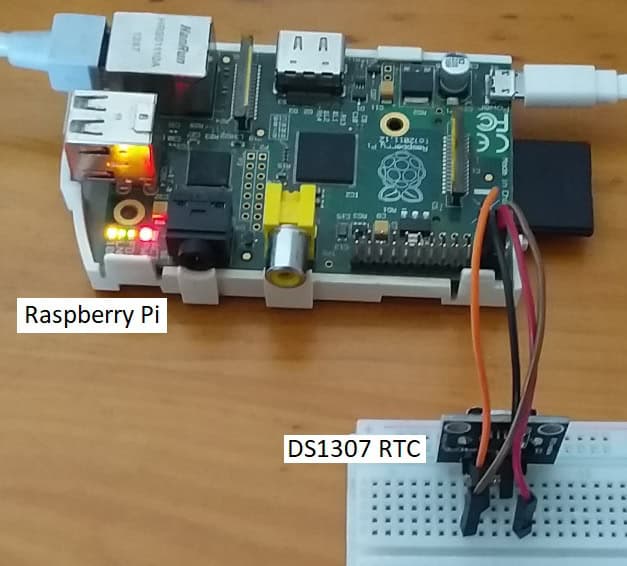
The Raspberry Pi does not have a built-in module for keeping track of the date and time. This means that the Raspberry Pi will lose its memory of the date and time when powered off. However, there are alternative ways to provide accurate time information to the Raspberry Pi. Some of the methods include Global Positioning System (GPS), Time Server (NTP), and Real-Time Clocks (RTC).

In this tutorial, we will focus on real time clocks. We will describe how real-time clocks work, how to connect them to the Raspberry Pi, and finally, describe all the steps required to setup the DS1307 real time clock on the Raspberry Pi.
What are real-time clocks
A real-time clock is an electronic integrated circuit (IC) for accurately keeping track of the date and time. NXP and Microchip are the biggest vendors in this market. An RTC module consists of the real time clock chip, a coin cell battery holder, a crystal oscillator, and an I2C interface. Pin headers are also added to make it easy for users to connect to their applications.
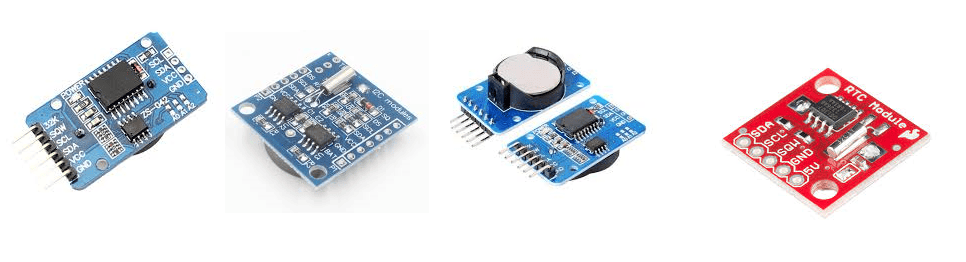
As we can see in the image above, RTCs run on a coin cell battery (usually a 3V CR1220 battery) so they are not connected to the computer’s power system. This is to ensure that the RTC keeps running when the computer’s power is switched off.
Uses for real-time clocks on the Raspberry Pi
Keeping track of the date and time on the Raspberry Pi or any microcontroller system is an important task. This comes in handy, especially in data-logging applications where the sensor readings are supposed to have accurate date and time stamps. Besides accurately keeping time, real-time clocks on the Raspberry Pi can be used for:
- Synchronization – Suppose we have many sensors that send data to a central data storage device. Each sensor is supposed to send its readings at specific intervals predetermined by the system. So we need to synchronize the time of all the remote nodes such that they send data at the correct times. This avoids data loss or data collision from the sensors in our network.
- Power control – One of the most efficient ways of improving a battery powered Raspberry Pi’s operating time is by using an RTC. This includes incorporating sleep modes in an application to conserve battery power and extend the battery’s life. So, in applications where there are sleep modes, the host will need to know when to wake up the device or send it to sleep. To do that, the host needs accurate time information, and the RTC is one of the best candidates for keeping track of the time.
How real-time clocks work
The DS1307 IC uses I2C serial interface for communicating with the host CPU. However, we will not delve deep into the inner workings of the I2C interface on the Raspberry Pi. That topic has been covered extensively in previous tutorials on I2C LCDs and I2C basics.

Pin Description of the DS1307 IC
- X1 and X2: Connections for standard 32.768 kHz crystal oscillator. Learn how to tune a crystal oscillator circuit to a specific frequency here.
- VBAT: Input connection for a standard 3V coin cell battery. Normally, the battery voltage should be between 2V and 3.5V for suitable operation.
- GND: Ground connection
- SDA: I2C serial data interface
- SCL: I2C serial interface clock input
- SQW/OUT: Square wave/output driver. When enabled, the SQWE bit set to 1, the SQW/OUT pin outputs one of four square-wave frequencies (1Hz, 4 kHz, 8 kHz, and 32 kHz).
- VCC: Primary power supply
The DS1307 operates as a slave device. It obtains access to the serial bus by performing a START sequence and providing the IC’s identification and an address for the registers.
The DS1307 module has an input power port and a battery port. When the external power input (Vcc) falls below 1.25 x Vbat, the IC terminates access to on-going processes. When Vcc falls below Vbat, the IC switches into a low current and relies on the cell. It will only switch back to Vcc when Vcc goes higher than Vbat + 0.2V.
How to connect a real-time clock to the Raspberry Pi
These are the parts you will need:
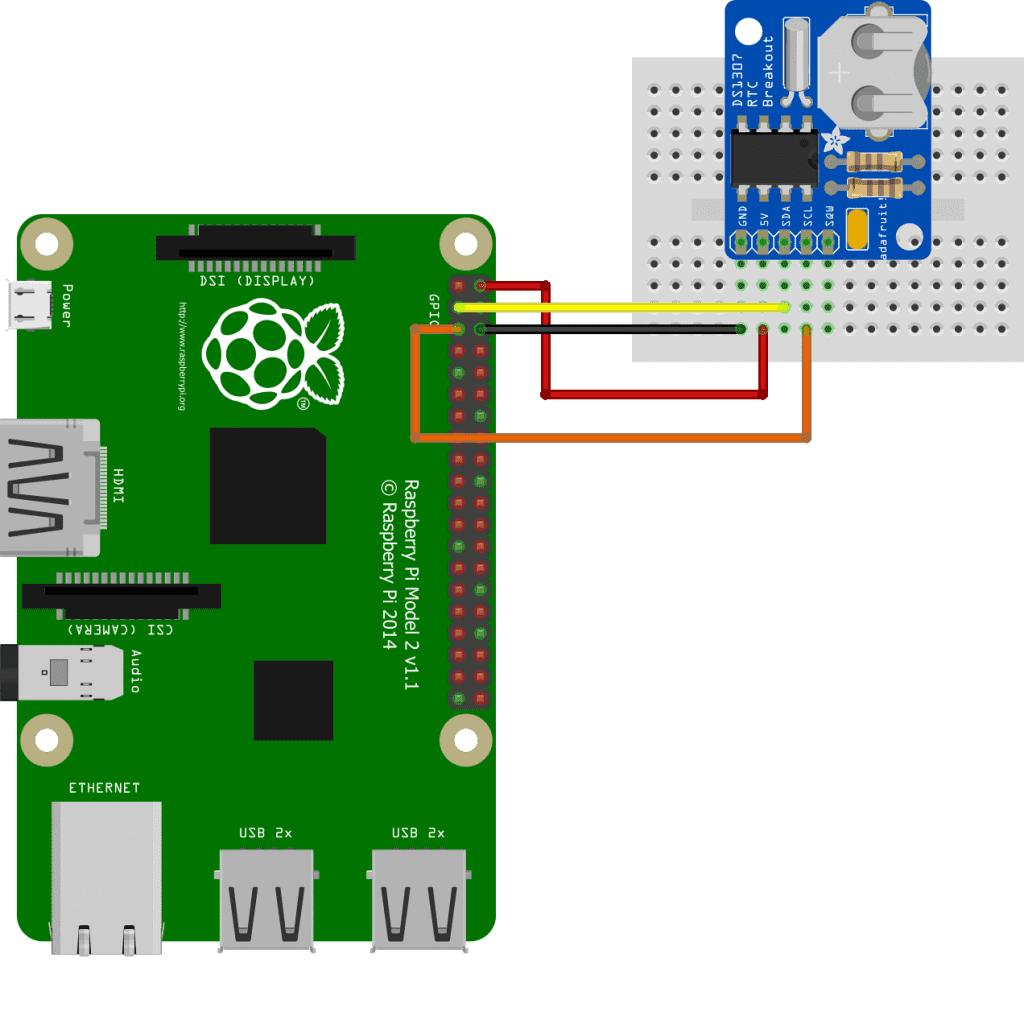
Follow this wiring diagram to connect the DS1307 RTC module to the Raspberry Pi:
How to configure the real-time clock
The first thing we need to do on the Raspberry Pi is to enable the I2C interface by using the sudo rasp-config command. The navigation to the I2C interface settings differ from distro to distro, but they are mainly found under the Interfacing options menu. Navigate to the correct options until you get to the I2C window, as shown in the diagram below.

Click yes to enable the I2C interface. Recent Raspbian distros have the RTC and DS1307 modules loaded in the kernel, so we do not need to install anything. However, if you are using early versions of Raspbian, you need to install the packages which enable the Raspberry Pi to interact with the RTC module. Communication is basically via an I2C link, so before we use the module, we need to install the I2C drivers. We use the following command:
sudo apt-get install python-smbus i2c-toolsWe load the RTC module by running :
sudo modprobe rtc-ds1307Then, run as super user by typing sudo bash and then use the following command:
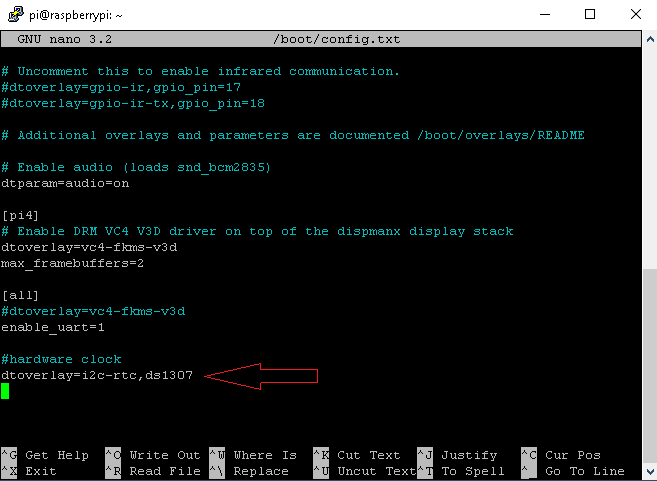
echo ds1307 0x68 > /sys/class/i2c-adapter/i2c-1/new_deviceNext, exit root user by typing exit on the terminal. After that, we need to add a device tree overlay opening the config file and adding the text: dtoverlay=i2c-rtc,ds1307.
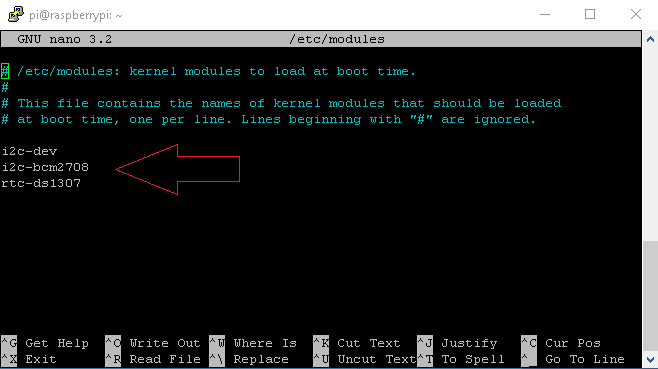
Then, we need to load the I2C module at boot time so we add the following lines of text to the modules file:
i2c-devi2c-bcm2708rtc-ds1307
Lastly, we need to create a script that updates the Raspberry Pi time from the hardware clock at boot. We add the following lines of code to the /etc/rc.local file.
echo ds1307 0x68 > /sys/class/i2c-adapter/i2c-1/new_devicesudo hwclock -sdate
Reboot the Raspberry Pi and check whether the DS1307 RTC module has been detected. Run the following command:
sudo i2cdetect -y 1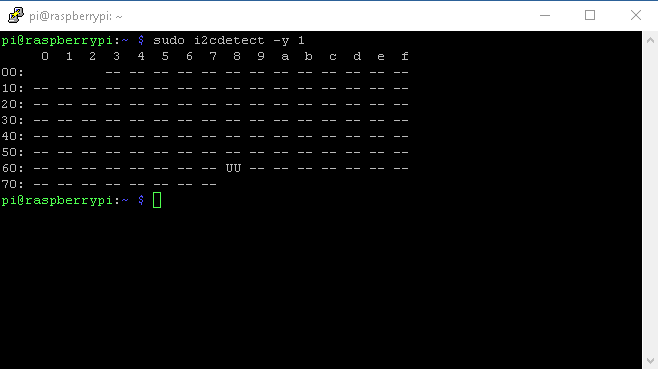
How to check the date and time output by the RTC
We now have a communication link between the Raspberry Pi and the RTC module. We now need to set the correct time on the RTC to use it every time the Raspberry Pi boots. To do this, we initially use the Raspberry Pi system time to update the RTC time. We use:
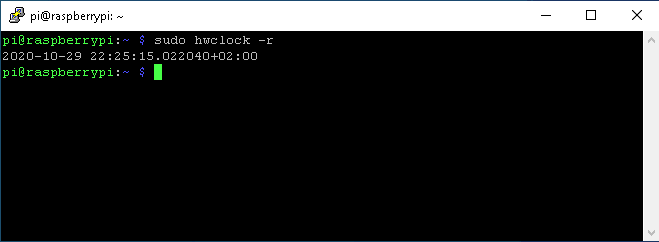
sudo hwclock -wNext, we need to check whether the RTC time has been updated. To check the current RTC time, we run:
sudo hwclock -rAnd we get the following output:
RTC date and time format
The image above shows a sample output from the RTC. The date and time details are represented as:
- 2020-10-29: Year, month and day
- 22:25:15 Hour, minute and seconds
- +02:00: 2 hours ahead of GMT time.
How to set the date and time on the RTC
Finally, we need to ensure that the Raspberry Pi uses the date and time information from the RTC as the system date and time. We execute the command:
sudo hwclock -sTo check that the Raspberry Pi system date/time has been set from the RTC, we query the date and time information from the Raspberry Pi system by running "date" on the terminal. Consecutively, we also query the RTC time to check whether the details are in sync.
date
sudo hwclock -r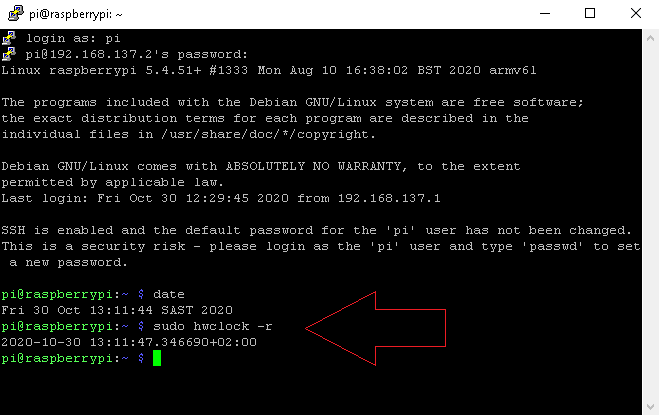
Here, we see that the Raspberry Pi system and the RTC year, month, date, hour, and minute details have been synchronized. However, only the seconds are out of sync by a difference of 3 seconds, which may be negligible in some applications. In future research, we hope to investigate the causes of this difference.
Updating the Raspberry Pi system time on boot
This is the last step, but this is very important. Here, we want the Raspberry Pi to pick up and use the time from the RTC automatically. We may want the application to run remotely without manually using commands to update the Raspberry Pi system time. Here are the steps to follow.
Remove the fake hardware clock
We run the following commands in succession to disable the fake hardware clock:
sudo apt-get -y remove fake-hwclock
sudo update-rc.d -f fake-hwclock remove
sudo systemctl disable fake-hwclock
Run sudo nano /lib/udev/hwclock-set and comment out the following lines of code:
#if [ -e /run/systemd/system ] ; then
# exit 0
#fi

/sbin/hwclock --rtc=$dev --systz --badyear

/sbin/hwclock --rtc=$dev --systz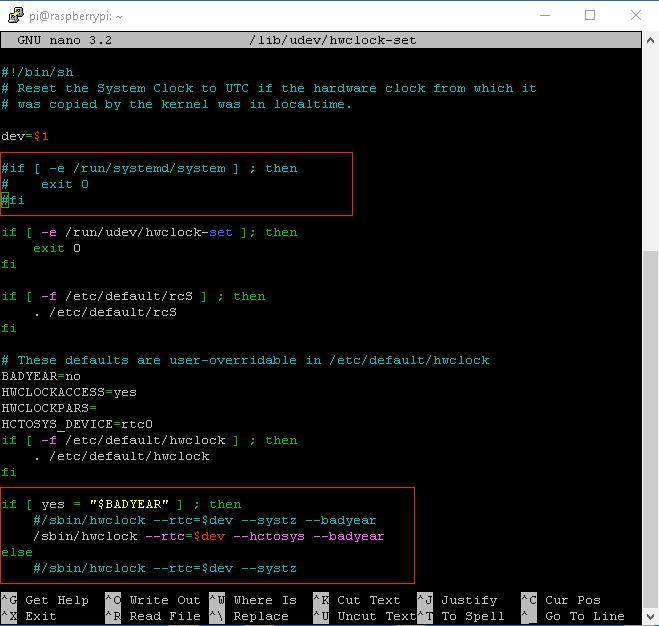
Sync time from RTC to the Raspberry Pi on boot
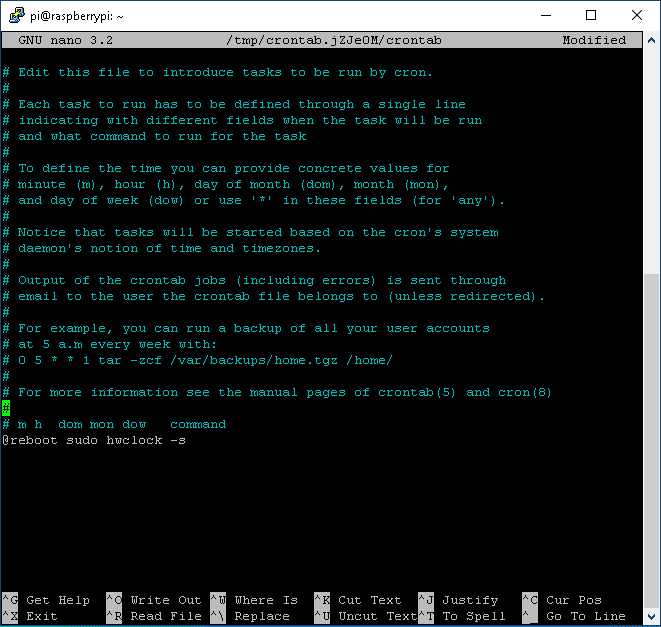
Several authors have suggested editing the /etc/rc.local file. However, this did not help me sync the Raspberry Pi system time on boot. A simple workaround to this is to create a cron job that runs the command to update the time on boot. Open the crontab by running sudo crontab -e, and then add @reboot sudo hwclock -s at the end of the file.
Congratulations! We’re done setting up the RTC on our Raspberry Pi. The next time we boot the Raspberry Pi, it will automatically sync with the RTC module’s time. Be sure to leave a comment below if you have questions about anything!


