In this article, we are going to make the Arduino UNO and an ESP8266 module tweet the temperature and humidity readings of a DHT22 sensor every hour.

For an introduction to IFTTT, web requests, and Webhooks, see our article How to Send Text Messages With an Arduino.
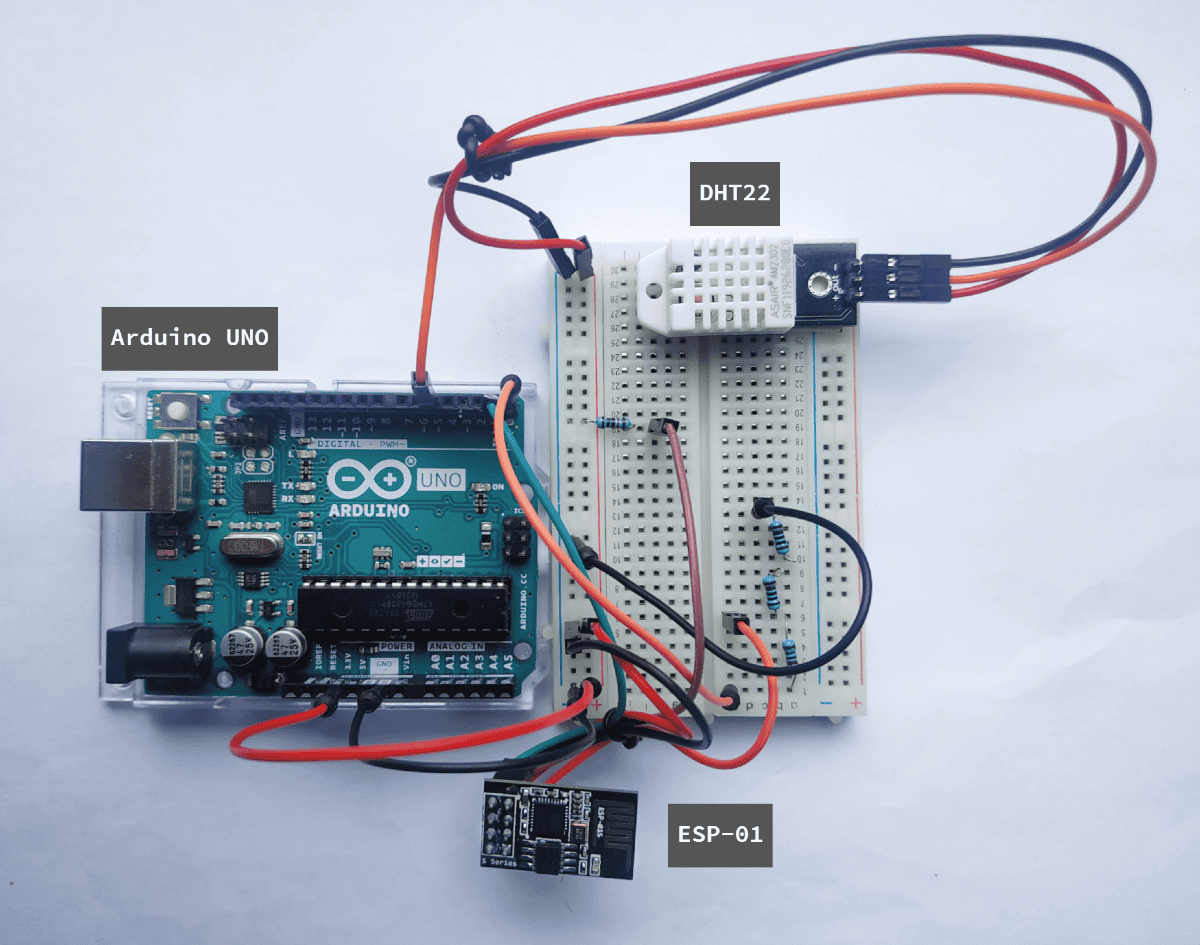
Preparing the Hardware
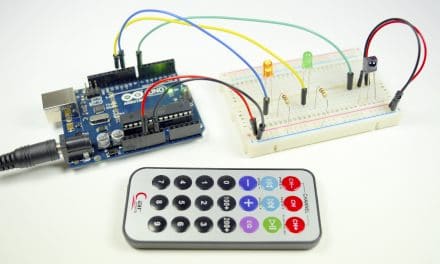
For this project, we are going to interface a DHT sensor with Arduino UNO, then transfer the temperature and humidity values to the ESP8266 every hour. The ESP8266 module is set to send a POST request when it receives the data. Ultimately, the POST request triggers the applet, which then writes a tweet to the account you’ve registered in IFTTT.
In order to do that, we need the following components:
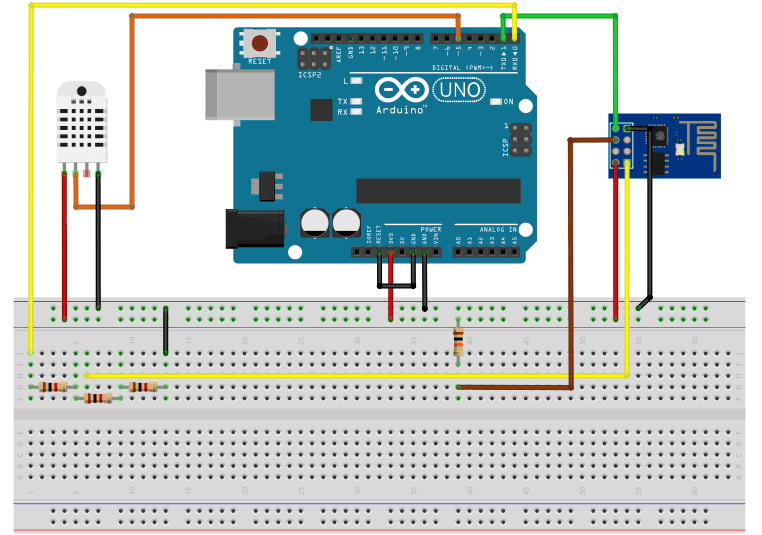
Once you have all of the components, connect everything together following this wiring diagram:
To learn more about the Arduino, check out our Ultimate Guide to the Arduino video course. We teach Arduino programming and circuit building techniques that will prepare you to build any project.
Setting Up IFTTT
First, go to IFTTT’s website and create an account.
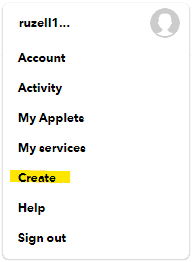
Once logged in, go to the top right toolbar on your homepage and click create. This directs you to a page where you can start creating an Applet.
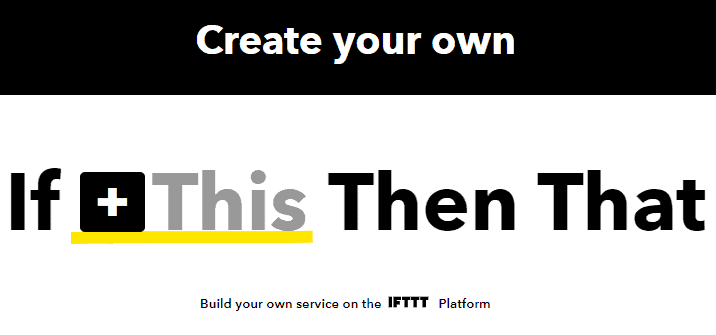
Then, set a condition by clicking “+ This”.
Next, search for webhooks.

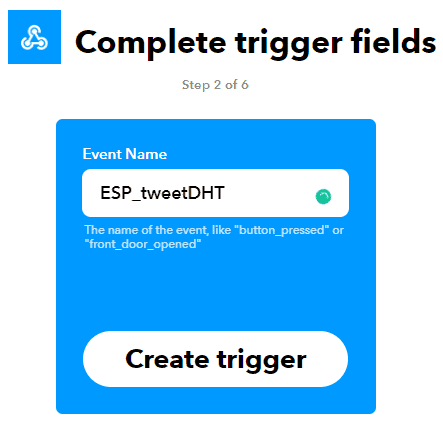
Under webhooks, choose to receive a web request. Click create trigger after naming your event.
Now, to set the action, click “+ That”.

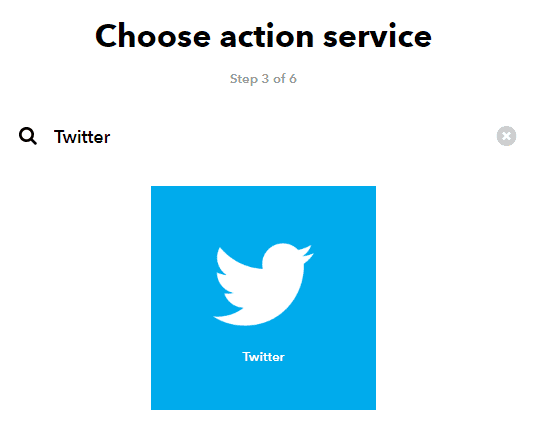
Next, search for Twitter as action service.
If you don’t have a twitter account paired with IFTTT yet, a prompt will appear. Click connect to register your twitter. You need to log in your account after this.

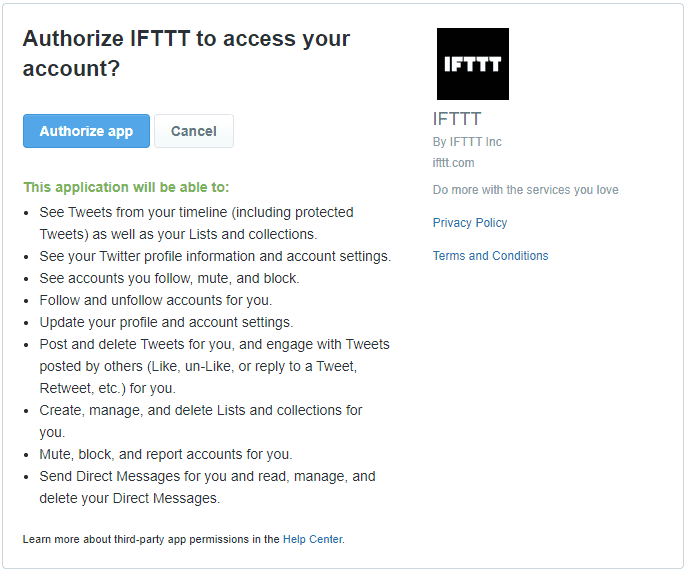
Next, authorize IFTTT to access your twitter account.
After your account has been registered, return to IFTTT. Select “Post a Tweet” as the action.

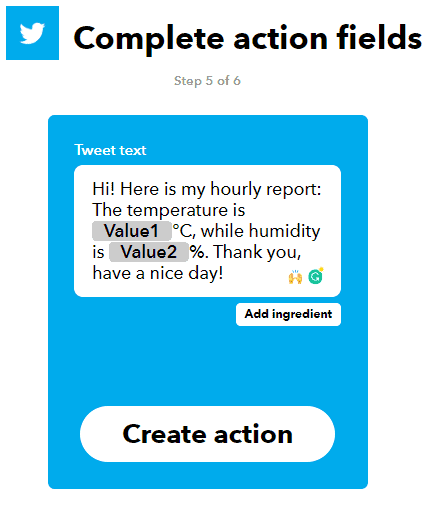
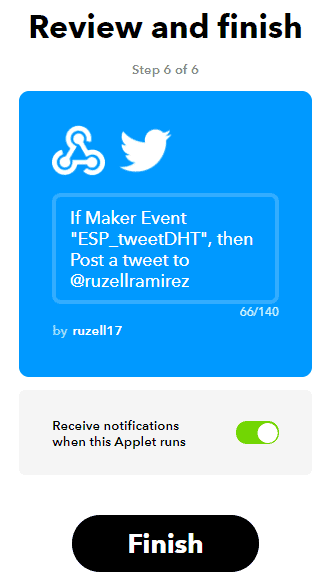
Lastly, compose the tweet. There are convenient variables you can use to compose your message: EventName which contains the name of the event; OccurredAt which displays the date and time when the event is triggered, and; Value that can contain any number you want to send to the IFTTT server.
Check whether you have put the correct details.
The applet is now ready. Now, to enable your android device for the SMS notifications, search IFTTT in Google Playstore and install.
After installing, log in with your IFTTT credentials to pair with your account.
Acquiring the Key
To trigger the Applet recipe, we need the key along with the event name on our HTTP request. To obtain your unique IFTTT key, go to the homepage and search for webhooks on the top-left search bar. You can find the webhooks under services.

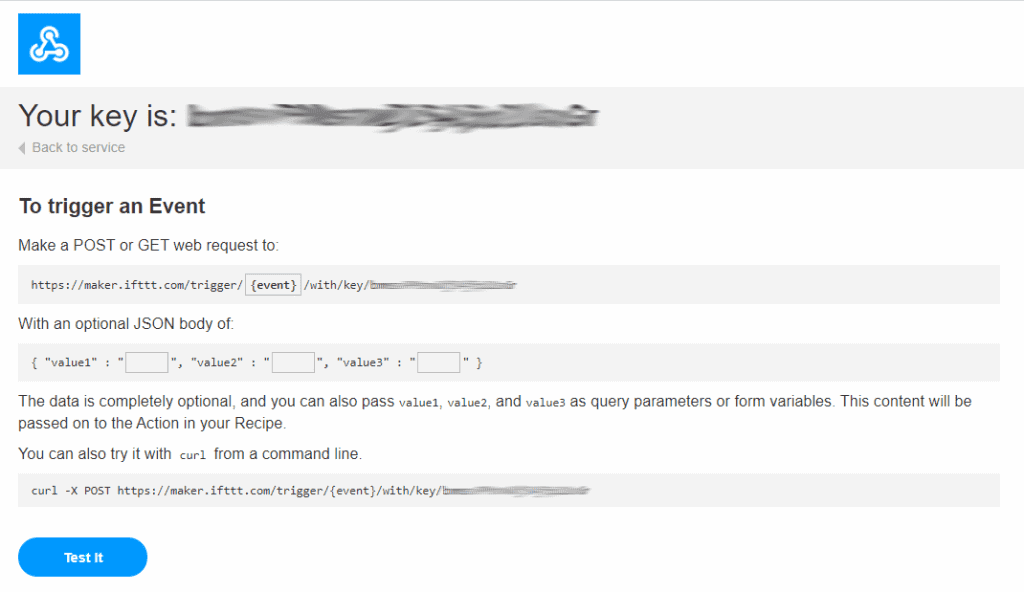
Now on the webhooks page, click the Documentation link at the top-right corner of the page.
Finally, a page that contains your personal key, and the complete web request for your event appears. This key is unique to every IFTTT account. By including the event name with it, you can trigger an IFTTT action via webhooks. Finally, let’s proceed to our code.
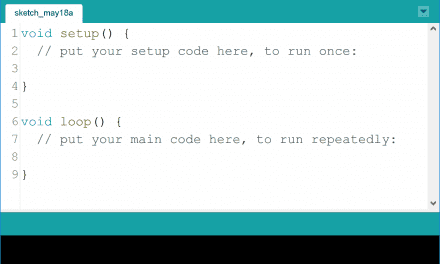
Code for the Arduino
#include "SerialTransfer.h"
#include <DHT.h>

#define DHTPIN 5
#define DHTTYPE DHT22
DHT dht(DHTPIN, DHTTYPE);
float t,h;

SerialTransfer myTransfer;

void setup()
{
  Serial.begin(115200);
  dht.begin();
}

void loop()
{
  t = dht.readTemperature();
  h = dht.readHumidity();
  Serial.println(t);
  Serial.println(h);
  myTransfer.txObj(status, sizeof(t));
  myTransfer.sendData(sizeof(h));
  delay(3600000);
}
Code for the ESP8266 Module
#include <ESP8266WiFi.h>
#include <ESP8266HTTPClient.h>
#include <WiFiClient.h>
#include "SerialTransfer.h"

SerialTransfer myTransfer;

const char* ssid     = "Wifi Name";
const char* password = "WiFi Password";

const char* resource = "https://maker.ifttt.com/trigger/YOUR EVENT NAME HERE/with/key/YOUR KEY HERE";
const char* server = "maker.ifttt.com";

void setup()
{
  Serial.begin(115200);

  WiFi.mode(WIFI_STA);
  WiFi.begin(ssid, password);

  while (WiFi.status() != WL_CONNECTED) {
    delay(500);
  }

  myTransfer.begin(Serial);
}

void loop()
{
  if(myTransfer.available())
  {
    float t,h;
    myTransfer.rxObj(myFloat, sizeof(myFloat));
    HTTPClient http;
    http.begin(serverName);
    http.addHeader("Content-Type", "application/x-www-form-urlencoded");
    String httpRequestData = "value1=" + String(t) + "&value2=" + String(h);
    int httpResponseCode = http.POST(httpRequestData);
    http.end();
  }
  delay(10000);
}
Code for NodeMCU
#include <ESP8266WiFi.h>
#include <ESP8266HTTPClient.h>
#include <WiFiClient.h>
#include <DHT.h>

#define DHTPIN D5
#define DHTTYPE DHT22
DHT dht(DHTPIN, DHTTYPE);
int t,h;

const char* ssid = "Centropolis409";
const char* password = "ChitoMikeArnelRuz409!";

const char* serverName = "http://maker.ifttt.com/trigger/YOUR EVENT NAME HERE/with/key/YOUR KEY HERE";

unsigned long lastTime = 0;
unsigned long timerDelay = 10000;

void setup()
{
  Serial.begin(115200);
  dht.begin();
  delay(100);
  WiFi.begin(ssid, password);
  Serial.println("Connecting");
  while(WiFi.status() != WL_CONNECTED)
  {
    delay(500);
    Serial.print(".");
  }
  Serial.println("");
  Serial.print("Connected to WiFi network with IP Address: ");
  Serial.println(WiFi.localIP());

  Serial.println("Timer set to 1 hour (timerDelay variable), it will take 1 hour before publishing the first reading.");
}

void loop()
{
  if ((millis() - lastTime) > timerDelay)
  {
    if(WiFi.status()== WL_CONNECTED)
    {
      HTTPClient http;
      http.begin(serverName);
      t = dht.readTemperature();
      h = dht.readHumidity();
      Serial.println(t);
      Serial.println(h);
      http.addHeader("Content-Type", "application/x-www-form-urlencoded");
      String httpRequestData = "value1=" + String(t) + "&value2=" + String(h);
      int httpResponseCode = http.POST(httpRequestData);
      Serial.print("HTTP Response code: ");
      Serial.println(httpResponseCode);
      http.end();
    }
    else
    {
      Serial.println("WiFi Disconnected");
    }
    lastTime = millis();
  }
}
Code Explanation
Just like before, we use the SerialTransfer.h library to send the sensor data from the Arduino UNO to the ESP module. You can download it from here.
These are the important lines we’ve used from the library:
SerialTransfer myTransfer– creates a SerialTransfer instance called myTransfer.myTransfer.begin(Serial)– starts serial communication using baud rate Serial.myTransfer.txObj(status, sizeof(status))– creates an object specifically made for status.myTransfer.sendData(sizeof(status))– sends status in a packet right for its size.myTransfer.rxObj(status, sizeof(status))– receives status from the sender.
First, we write the program for the Arduino UNO. The UNO’s main job is to read DHT sensor data then send it to the ESP module every hour. We do that by using the DHT.h library, which you can get from this link. To properly use the library, you need to specify the pin where the sensor is connected and the type of DHT sensor you’re using. Then, we create a DHT object using these two. The code should look like this: DHT dht(DHTPIN, DHTTYPE). After creating the object, we initialize the sensor using dht.begin() to use functions like dht.readTemperature() and dht.readHumidity to get the sensor data. Finally, we use the SerialTransfer.h to send the data to the ESP module.
On the other hand, the program for the ESP module simply detects the incoming data from the Arduino and sends them to IFTTT using HTTP POST. First, to connect to the internet, we concatenate strings for your WiFi name, password, web request URL, and the IFTTT maker server using const char*. Next, using WiFi.mode(WIFI_STA), we declare the ESP8266 module as a station to prevent it from getting defaulted into other modes. With WiFi.begin and myTransfer.begin, we initialize WiFi connection and serial communication respectively. Unlike our previous article on sending text messages using Arduino, we now use ESP8266HTTPClient.h and WiFiClient.h libraries to ease our sending of the HTTP request. So now we only need to call the http.POST(httpRequestData) function to send the request. No more cryptic symbols needed.
I’ve also included the original code where I based my programs. It’s for a NodeMCU development kit. You can read the full tutorial here. The good thing about using the NodeMCU is that you don’t need to use serial communication to send the sensor data. This speeds things up a bit as serial connection is slow. It also makes your project easier to debug since it uses lesser components.
Demonstration
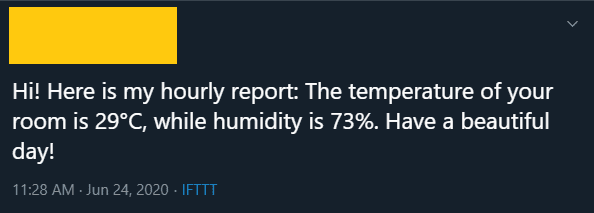
After uploading the code, the Arduino sends the POST request right away.

Then, after an hour, I got another tweet.
Let us know in the comments how this goes for you! And feel free to leave a comment below question if you have any questions.


Why do you need the Arduino? Why not just push everything through the ESP-01?
ESP-01 has 2 GPIO pins. I used an Arduino since some readers might need to control more than two components.
How to write the code for Arduino and ESP module if I want to send 3 values?