In this article, we’re going to learn how to detect vibration with the Arduino using shock sensors and knock sensors. Accelerometers are the most accurate way to detect vibration, and we’ll learn about them in another article. But for some projects, you don’t need such high accuracy. Shock sensors and knock sensors can be used to detect closing doors, excessive vibration in machinery, or collisions in remote controlled vehicles.

So what’s the difference between a shock sensor and a knock sensor? Shock sensors are more sensitive to small vibrations. Knock sensors are better for detecting stronger impacts. In this article, we’re going to be working with the Keyes KY-031 knock sensor and the Keyes KY-002 shock sensor.
Watch the video for this tutorial here:
How Knock Sensors Work
Here’s the Keyes KY-031 knock sensor:
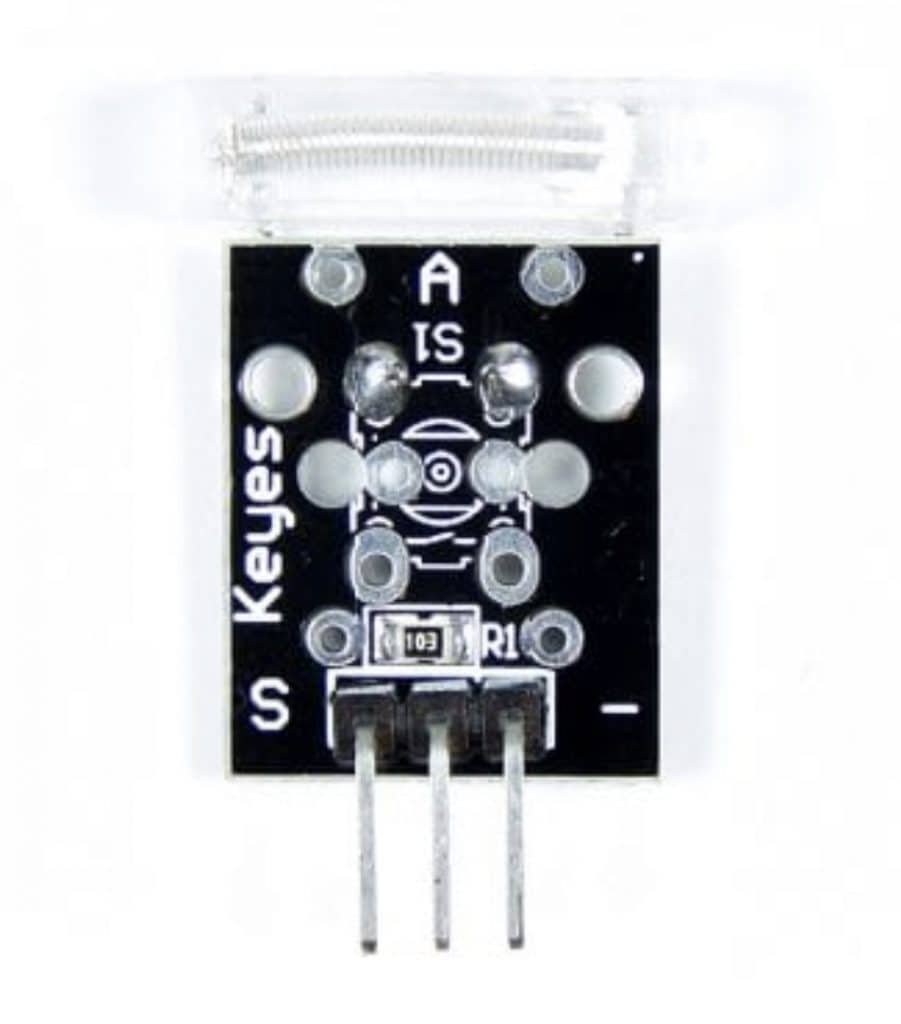
The pin with the “S” is the signal pin, the pin with the “-” connects to ground, and the middle pin connects to 5V.
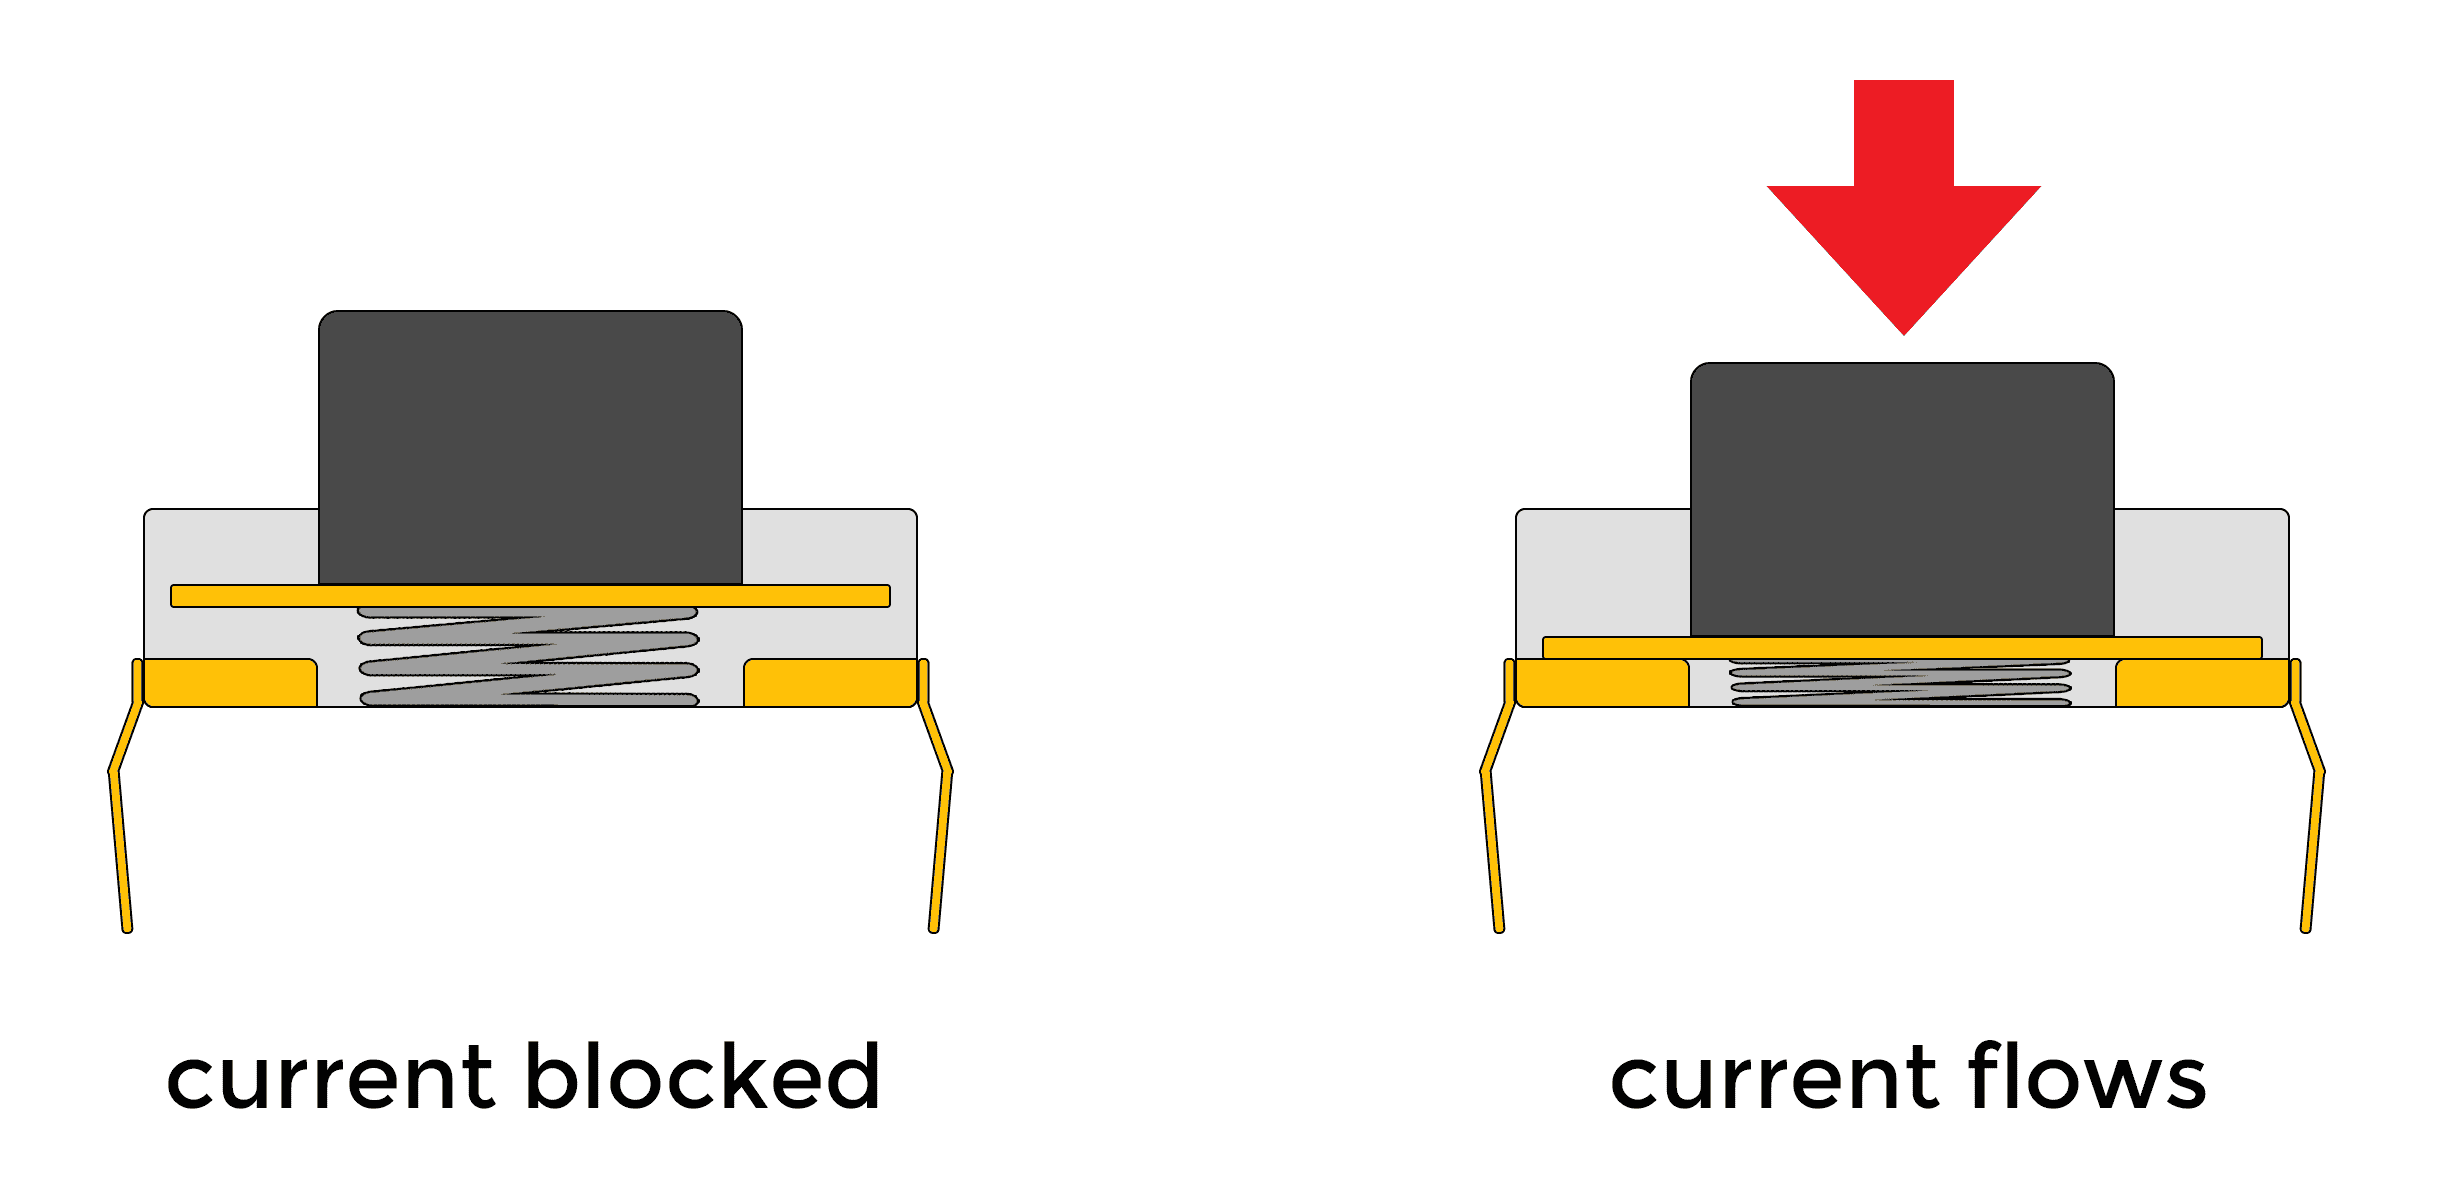
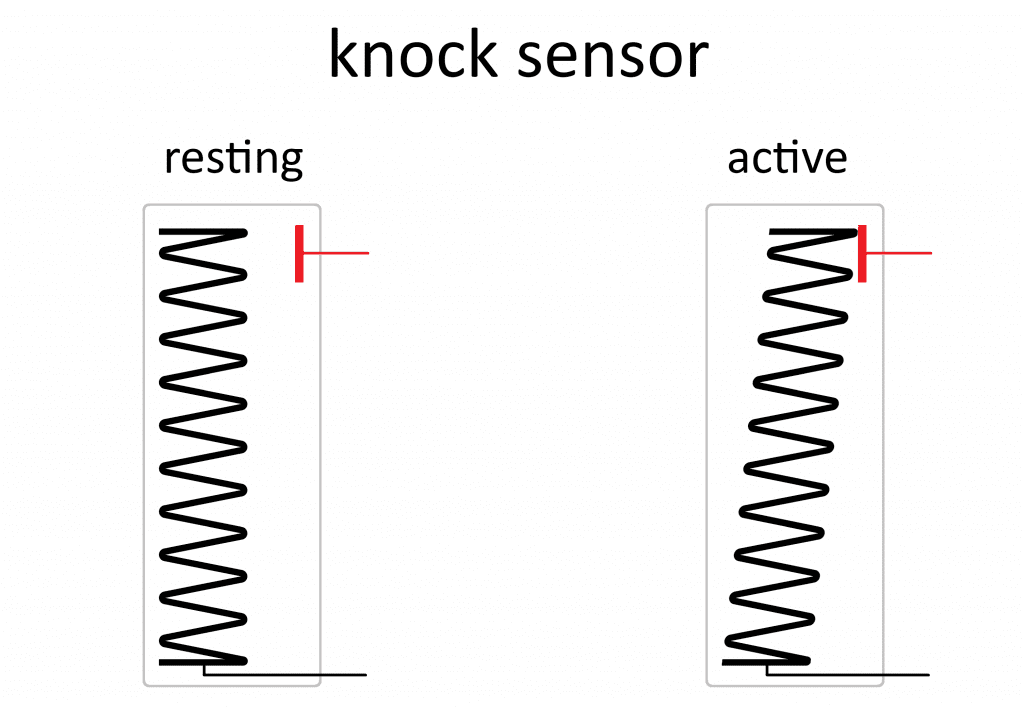
Inside the plastic case is a conductive wire coil. When the sensor receives a jolt, the coil flexes and contacts an electrode that allows current to flow between the coil and the electrode:
How Shock Sensors Work
Here’s the Keyes KY-002 shock sensor:
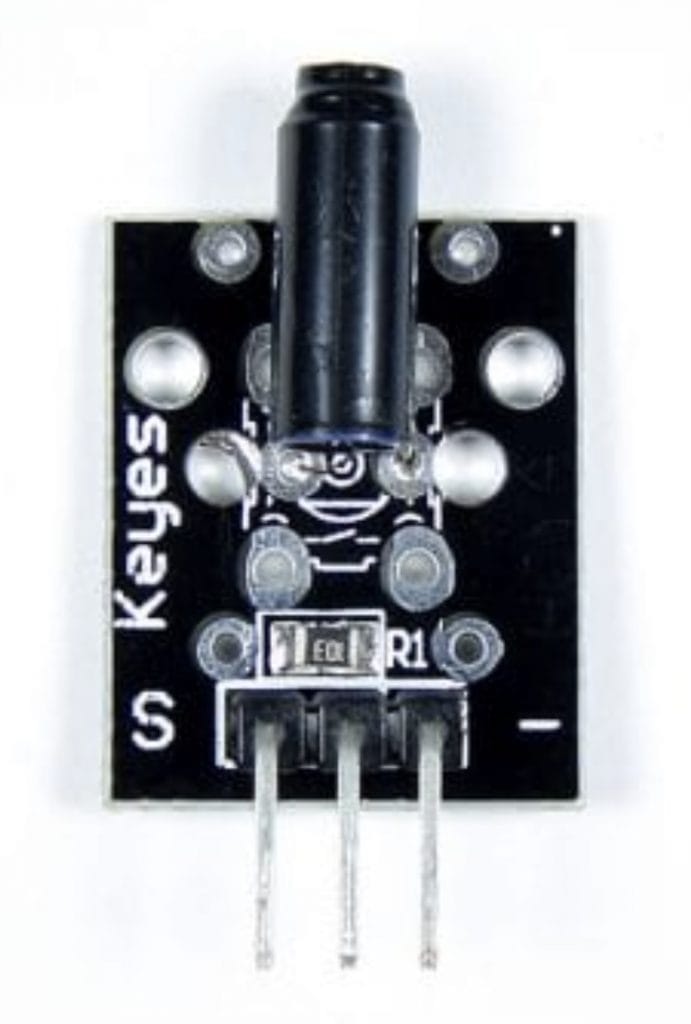
The pin with the “S” is the signal pin, the pin with the “-” connects to ground, and the middle pin connects to 5V.
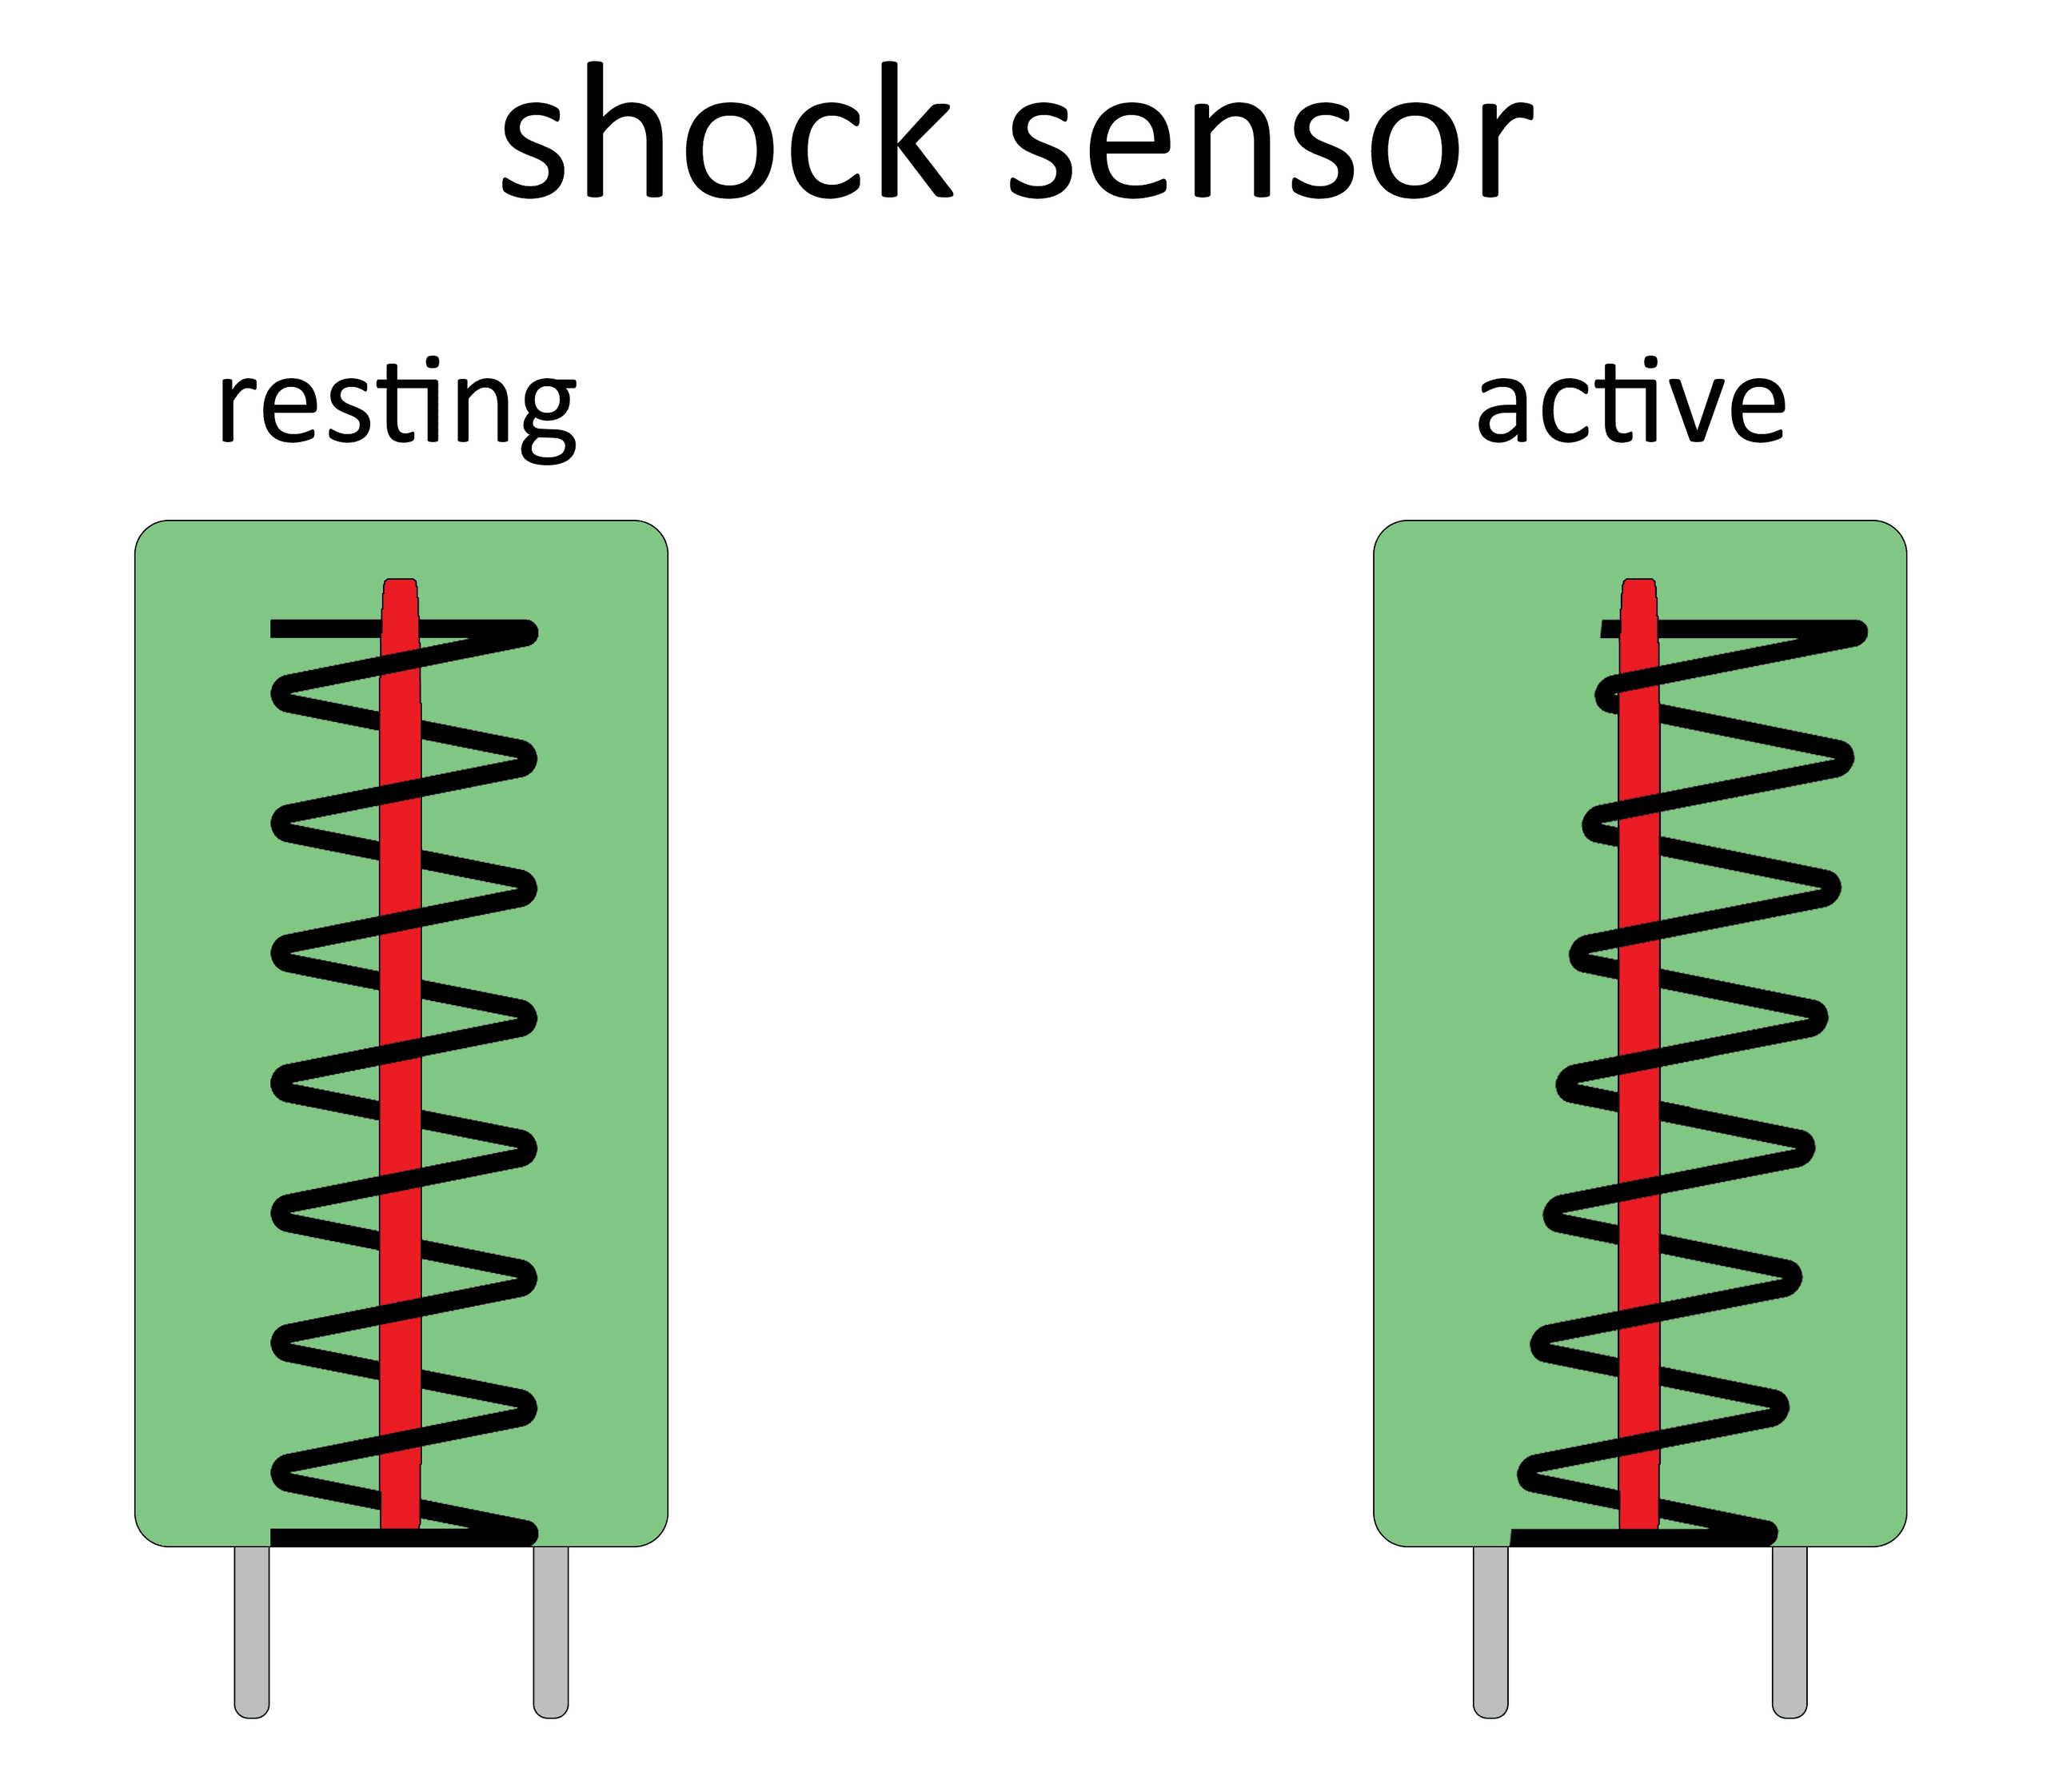
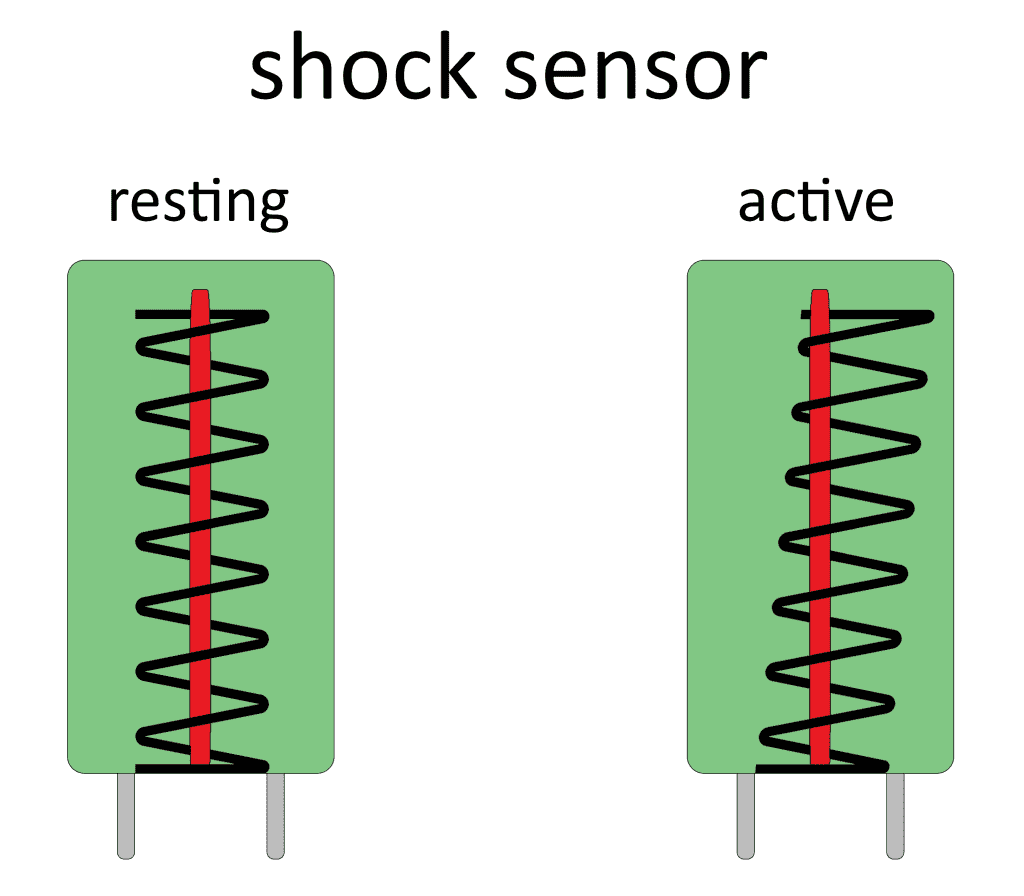
Inside the black tube, a metal spring attached to ground wraps around a metal rod that is connected to a positive voltage. A strong jolt or vibration causes the spring to bend and make an electrical contact with the rod, which allows current to flow between the rod and the spring:
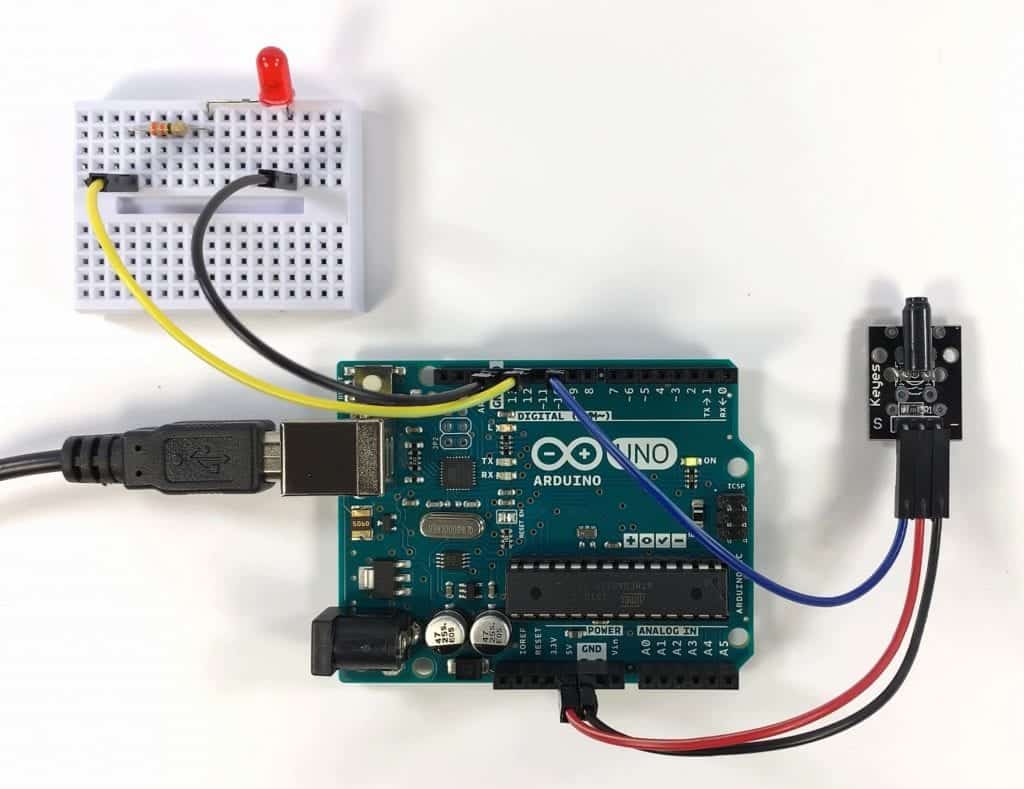
How to Connect Shock Sensors and Knock Sensors to the Arduino
Let’s see how to connect shock sensors and knock sensors to the Arduino with an example project that lights up an LED when the sensor detects a knock. LEDs are just an easy way to demonstrate the circuit. Any device controlled with a 5V signal can be activated by this circuit.
- Arduino Uno
- Jumper wires
- Breadboard
- Keyes KY-002 shock sensor
- Keyes KY-031 knock sensor
- One LED
- 10K Ohm resistor
Shock sensors and knock sensors have the same pin connections, so the wiring diagram below can be followed for either sensor:

How to Program Shock Sensors and Knock Sensors on the Arduino
Shock sensors and knock sensors both output a high signal at rest and a low signal when jolted. The sketch below will turn the LED on for one second when the sensor is activated. The sketch works for both shock sensors and knock sensors:
int sensorPin = 10;
int ledPin = 12;

void setup() {
  pinMode(sensorPin, INPUT);
  pinMode(ledPin, OUTPUT);
}

void loop() {
  int read = digitalRead(sensorPin);

  if (read == LOW) {
    digitalWrite(ledPin, HIGH);
    delay(1000);
  }

  else {
    digitalWrite(ledPin, LOW);
  }
}
Explanation of the Code
At the top of the sketch, we declare two pin variables. The sensorPin variable will store the high or low value detected at the sensor’s signal pin. Since the signal pin is connected to Arduino pin 10, sensorPin is set equal to 10. The ledPin variable will store the high or low value used to turn the LED on or off. The LED is connected to Arduino pin 12, so ledPin is set equal to 12.
In the setup() section we set the pin modes for the pin variables. The sensorPin variable is an INPUT and the ledPin is an OUTPUT.
In the loop() section we declare a local int variable called read, and set it equal to the digital read of the sensorPin. This tells the Arduino to detect the voltage at pin 10 and store the high or low value in the read variable.
Then we have an if else statement. The if statement says “if read is low, digital write the ledPin high and delay for 1,000 milliseconds. This turns the LED on for one second when the sensor outputs a low signal.
If read has a high value, the else statement is executed and we digital write ledPin low. This turns off the LED when the sensor outputs a high signal.
Once the sensor and LED are connected to the Arduino and the code is uploaded, tap the sensor on a table. You should see the LED turn on for exactly one second.
Depending on which sensor you’re using, you will see that the shock sensor is pretty sensitive. It doesn’t take very much force to get the LED to turn on. The knock sensor much less sensitive, and it actually takes some pretty hard tapping to activate it.
When installing shock sensors or knock sensors in your project, keep in mind that the sensor’s orientation will have an impact on its sensitivity. You might need to try different sensor orientations to get the response you need.